QBH Technology

分类
Blog

Engineering Requirements Document: Useful Tips for Writing a Good One!

Many engineers know what an Engineering Requirements Document (ERD) is. Included in this document are the requirements. It tells you what you need to do. A project to make a prototype must have detailed requirements.

Do the documentation of these records in a professional way. The ERD should be easy to read. It must show the process of making the material while meeting specific rules.

Engineers often make mistakes because they don’t write down what they need to do. This results in engineering design flaws.

So learning how to develop a good requirements document is crucial. You have to think about some things when you write an ERD. We’ve put together a detailed tutorial to help you make an effective ERD.

The Document’s Goal

A solid test plan starts with a list of requirements. Doing this promotes teamwork. Break down tasks into smaller ones with this method. This makes assigning duties to others simpler. Getting isolated units is easier if you have fewer internal resources.

You can use ERD to help the people working on a project communicate. During the writing of the document, a lot of guesses came up. This makes it easier for technical teams to verify it’s correct. Use this method to document the product and the designer’s intentions accurately.

It is a must that you understand the traits of ERD to develop effective project goals. A good project begins with a solid set of performance criteria. And ERD contains many of those.

engineering

Engineering Requirements – Documentation Quality Standards!

The best requirements documents must stick to a set of guidelines or criteria. There are a lot of easy-to-follow guidelines in this list. Some of them can be difficult to grasp at times.

An ERD should meet the following traits to consider good:

  • Coordinated

Every stakeholder in the product design must be happy with the product’s needs. It should show how the product can and can’t work and how it works.

  • Very easy to understand

It should also be short, clean, and clear in its message for everyone. One-sentence summaries of what you need are enough to convey the intended message.

  • Verifiable

Demonstrating and measuring compliance with specified requirements must be possible.

  • Workable

Practicality is essential for a well-written ERD. It should have a goal and be able to be shared. All these factors must come together to make it a reality.

  • Traceable

As a result, it’s important to trace it back to the customer’s initial wants. It must also describe the significance of the product’s design. A key part of determining the rationale for a requirement is determining where it came from and why.

  • Complete 

In a requirements document, there should be no ambiguity.

  • Necessary

Ensure that the document is valid and necessary for the specific technical work. It must also be constant and not have any negative side effects to be safe.

Even if demand does not meet all these requirements, it is still relevant. It signifies that working with the document will be more difficult in the future.

engineering

Requirements Documentation – Tips for a Great Engineering Document!

Below are tips to help you write a clear ERD for your components:

Tip #1 Using a Good ERD Template

Engineers are aware a good ERD is a vital part of the documentation process. For your documentation, use a suitable template. The requirements for a decent template include:

· Cover page

· Section heading

· Essential rules for each section

· A short explanation of the management system employed.

Included in the template are standard sections for some themes. You can see in this section the traceability and formatting standards.

Having a standard part in the template helps you stay on track with the project. You can change the parts of the template depending on the project.

Because of this, you should provide a strong platform for continuous ERD development.

Tip #2 Use a Hierarchical Structure to Organize Your Document

Organizing the documents in a hierarchical manner makes it easier for the engineers. Below is the illustration of the hierarchical structures:

Manager-Supplier

Function-Subfunction

Mission-Part

Having your paper organized in this way helps you focus on each of the system’s domains. You can make a complete document with this. It helps determine areas that need changes on the baseline standards. As a result, users of the requirements can get to the specific functional area they’re looking for.

Tip #3: Make Use of an All-In-One ID System

It makes it easier to track down high- and low-level requirements by adding a project ID to each one. The use of short names also makes it easier to make traceability tables. These tables show how each need comes from higher-level texts in a clear way.

Tip #4 Language Standardization of Your Requirements Document

Standardizing the wording in your ERD is a great way to avoid misunderstandings. Consider adding a definition section to your mechanical design files. It’s also good to say what words mean in documents that don’t have to do with requirements.

Tip #5 Consistency in Using Imperatives is Vital

Impossible verbs like shall, should, must, will, and so on have been the subject of heated debate for a long time now. You can use imperatives in your writing, so be sure to keep things the same when you use them. In general, each requirement should have a single purpose statement that is the same for all.

Tip #6: Use Rationale Statements

Users can get more information from an ERD that is easier to read. The use of rationale statements in this document helps to make the text easier to follow. You should tell your wants and needs apart from the arguments for those needs. Afterward, your reasoning will be much clearer and easy to follow because of this.

engineering

Tip #7 Requirement Formatting Best Practices Should Not Be Forgotten

You need to learn how to write fast to understand how to make an ERB. The use of well-known sentence structures in the places where they’re needed is a good idea. The best way to ensure that a requirement is clear is to learn some basic sentence patterns. An excellent way to start is with the following basic format:

Unique ID: object + provision (shall) + action + condition + declaration of purpose (will).

Tip #8 Before Verifying a Document, It’s Critical to Conduct a Quality Check

First, make sure your report is free of mistakes in spelling and grammar before you send it to a client or boss. Perform a lot of quality checks. This will ensure that everything is correct, precise, and consistent. If you go over your requirements document again, a checklist for quality assurance will come in handy. Cut down some steps, and best practices followed as a result.

Conclusion

Engineering requirements documents are a great start when working on a new product. When there are a lot of moving parts, it is even better. It’s a simple way to divide work among a group of engineers, and it doesn’t take long.

The ERD gap can be closed with the help of QBH Technology concept creation. They do this through open and honest dialogue. One of the strongest support services in the industry is provided by the company. Having a design file isn’t a problem at all. 

分类
Blog

Sheet Metal Enclosure Design: Key Enclosure Design Tips!

No electronic product would be complete without a case or cover. If an electrical product is big or complicated, it must be in an enclosure to keep it safe from the outside world. With a sheet metal enclosure, you can cut down on emissions. It makes it more durable in harsh industrial environments.

The ultimate goal of a sheet metal fabrication company is to make a high-quality product. A high-quality case for electronic parts helps to achieve this goal. Sheet metal enclosures have their own set of rules.

These tips will make your job easier and help you get better results. Here are some tips for making a sheet metal enclosure that will help you keep up with the times. Let’s start right away!

Know the Product Design Requirements!

It is important to know what the product looks like and how it works throughout the design process. Making a sheet metal enclosure is the same. The more you know about these things, the easier it will be to make a sheet metal enclosure that meets your needs.

The following are some of the things you should know about the products you want to buy:

  • The use of sheet metal cover.
  • The conditions in which the enclosure will work, like temp, corrosion exposure, and the IP rating.
  • Specs on how big things are.
  • There is a wide range of mounting options, such as wall, pole, and tabletop.
  • The component you want to put inside the enclosure, including its height and width.
  • The locations of its connectors and other parts.
  • Needs in terms of how they look.

Choose a Material for the Design of a Sheet Metal Enclosure!

The next thing to do is choose a metal that fits your needs. The use of your sheet metal enclosure will help you decide what kind of metal to use. You don’t want to choose a metal that will quickly break down in a particular place.

It’s essential to choose metals that can withstand corrosion and wear. Before we go any further, look at the properties of the best metals to use for your enclosure.

Sheet Metal

· Aluminum

There are two good things about this material: It is resistant to corrosion and lightweight. At times, it is not as strong as steel.

There are many different types of aluminum, and each one is different. There are two primary aluminum alloys in sheet metal enclosures: 6061 and 6063, each of which has its own name.

If you bend 5052 aluminum, it won’t break. This alloy is easy to machine and weld, making it good for sheet metal enclosures.

But, 6061 aluminum is more likely to break than the other aluminum alloys. It is machine-friendly.

Aluminum is a good material for sheet metal parts and enclosures because it is light and doesn’t rust. Anodizing aluminum parts may give them a long-lasting and protective finish keeping them safe. Chromate coating is a good choice for a part that needs to be near electricity.

· Stainless Steel

This alloy has nickel and chromium in it. So, corrosion resistance will be much better. In terms of strength, stainless steel is a lot better than aluminum.

You can use it to make them more durable when making enclosures out of sheet metal for high-impact devices. A grained finish on stainless steel gives it a unique look that stands out.

· Galvanneal

Low-carbon steel that has been zinc-coated and annealed is what this is made of. Annealing is used to ensure that the zinc is stuck to the surface. So, you can be sure there won’t be any flaking off when you bend or shape.

Galvanneal is the best choice if you want to use the metal enclosure in a wet place. For it to be resistant to corrosion, it needs to have a specific type of coating on top of it.

· CRCA

An annealed steel that is rolled very close together is a good choice for indoor enclosures and parts that must be kept clean. It’s also very strong and rigid at the same time. It has the best chance of being around for a long time when it’s inside.

When left uncoated, CRCA is vulnerable to corrosion. This can cause rust because it is not strong enough.

· Copper

Copper is a good metal, but it’s not usually used in sheet metal enclosure design. It’s a good conductor of heat and electricity. As a result, electrical applications can be used.

There are only a few enclosures made of copper because it’s too fragile to stand up to a lot of weight. Copper is best used for bus bars or other things.

We can’t fully help you design a sheet metal enclosure if you don’t know what to look for when purchasing metal. Before choosing a metal for your project, think about the following things.

  • When something is stretched, it has high tensile strength.
  • Weldability and the ability to make things by hand and machine.
  • There is a lot of corrosion resistance.
  • There is wear resistance.
  • The weight of electronic enclosures must be kept in check.
  • Easy to put together
  • The ability to move heat and electricity
  • Cost

Choose Suitable Shape of Enclosure!

Another essential sheet metal enclosure design tip is to pick the right shape for your enclosure.

When you design the PCB and the system, think about how the enclosure will look when you’re done with it. You can avoid a lot of the most common design flaws.

sheet metal

Compared to making plastic enclosures, sheet metal may be a little more limited in what you can do. However, if you use these shapes, you can make helpful, cost-effective, and visually appealing enclosures.

· Folded Box Shape

In a box with a lid that comes, it has four sides. Easy access for service and more mounting options are made possible because this enclosure has a unique shape.

· F-Shape

An enclosure in this style doesn’t take long at all to make. PCBs with connections on both sides work well in an F-shaped case.

· L-Shape

People can easily figure out how to build an L-shape enclosure because it’s simple. Besides being easy to understand, the geometry makes it easy to use as well.

· U-Shape

In the same way as F-shape boxes, U-shape boxes are also easy to make. They usually have strong bases and are easy to get to for repairs.

Understand Sheet Metal Thicknesses!

When it comes to making enclosures, the thickness of the metal is very important. The thickness of the enclosure is often a factor in its strength, weight, flange length, and punch size.

In general, thick metals are more difficult to work with than thinner metals, which you may have already known. In addition, to make large parts with more strength, you need to make the material thicker.

There doesn’t seem to be a lot of difference between the different thickness gauges on paper. However, if you know more about sheet metal gauges, you can figure out which option is best for your project.

Keep in mind that a sheet metal enclosure must always be made with a uniform thickness of wall all the way around. This is a good way to see how well the part is made.

Bend Radius Should Be Consistent!

The Bend radii should always add up to the thickness of the content. The width of the product should be the same as the Bend radius. CAD software will help you calculate your metal’s bend allowance digitally. It would be best always to consider your enclosure’s functional and aesthetic requirements.

Painting

The spraying of paint on the surface of your metal is part of the painting process. In general, your sheet metal enclosure will look better because of it. People will be able to recognize your brand more quickly as well.

Prototypes and Validation Testing Should be Done!

With the help of the sheet metal enclosure design ideas above, you will have a working idea. Next, the design needs to be changed to meet the customer’s needs and improve manufacturing efficiency.

Prototyping is the best way to get this done quickly and efficiently. New product development is important for companies that make sheet metal.

In the next step, your design will be put through its paces in the real world of work. But, your customers may not be happy with the prototype you made for them.

Testing is very important, and it can’t be overstated. Decisions can be made about whether to make things on a large scale here.

You can do validation testing by using the product or performing simple tests in the outside world. You might find places that need to be changed and improved.

sheet metal

Conclusion

There are a lot of benefits to using sheet metal enclosures. They improve electrical conductivity, cut down on pollution, and withstand harsh industrial environments.

Also, they help to cut costs and turnaround times. People should make sure they are done right because of this. You can use the sheet metal enclosure design advice given to make the best decisions for your project.

When you are in the hands of experts, there is no better way to go. You can buy this through QBH Technology. QBH sheet metal processing has a lot of good things about it.

Sheet metal enclosure design is one of the skills of their very talented team. You will also benefit from the automated and streamlined production services they offer.

You’ll get the best results because they have strong manufacturing, quality assurance, and technical skills.

Custom machined parts with detailed dimensional reports are available for an immediate quote request. QBH Technology’s customer service department can help you get started. You can send them your design files or send them an email to get help.

分类
Blog

Top Tips for Reducing Sheet Metal Fabrication Cost!

Prototypes are usually made of sheet metal. Fabricators use it in high-volume parts manufacturing. Many businesses are using this method because it has a lot of commercial benefits. Disagreements can arise over how much it costs for sheet metal fabrication.

A sheet metal project’s design, finishing methods, and probable prototype all have costs. Materials, as well as the method, are an extra cost. Cost-cutting is important if you want the most out of your sheet metal project.

There are lots of things that can affect sheet metal fabrication prices. Good thing there are also many ways to cut costs. Let’s talk about how to figure out how much it will cost to make sheet metal first.

sheet metal

What Affects the Cost of Sheet Metal Fabrication?

When making a project budget, you should figure out how much it will cost to make sheet metal. There have been a lot of technological changes that have made it easier to finish projects at a low cost.

It’s essential to figure out how much it will cost to make sheet metal to save money in the long run. This section will talk about how much it costs to make sheet metal.

1.The Cost of Installation

It’s hard to figure out how much it will cost to make sheet metal. It’s because you don’t know how long the installation will take. A single fabrication cost does not include installation and material costs. Installation costs often include:

  • Hiring skilled workers
  • Obtaining installation licenses or permits
  • Buying installation safety gear
  • Cost of delivering fabricated items to the job site

2.Raw Materials Costing

The first step in making metal is to choose suitable materials. Note that the metal market can have an effect on the prices of parts from time to time.

When raw materials go up or down in price, it changes how fabricators figure out how much their prices will be. Also, how close the factory is to the raw materials affects how much it costs to make things.

There is a direct link between the cost of materials and labor and the thickness of the metal used to make it. The use of a lot of different materials in a project may lead to higher costs.

If there are problems with the supply lines for raw materials, their price could go up and down.

sheet metal

3.Sheet Metal Fabrication Costs for Plating and Welding

Welding pre-plated sheet metal isn’t the safest method of construction. Zinc oxide, which is very toxic, comes out of the coatings when the metal is heated up.

Workers and the environment are in danger as a result of this incident. Welding, especially when using pre-plated sheet metal, increases fabrication costs.

In this case, let’s assume that you decide to use uncoated cold-rolled steel in your project. Corrosion resistance is improved by applying a coating following the production process. Your costs and lead times will rise as a result. As a result, you must revisit your ideas and look for solutions to get rid of welding.

4.Physical Work Is Necessary

When you make custom sheet metal parts, you need a group of people who know how to do things well. Some of these professionals include licensed welders and assembly technicians.

The workforce needed to finish the metal fabrication process depends on the workload. A sheet metal fabrication project could cost more or less if this is the case.

The best companies that produce parts use computer-aided design all the time. Also, how good the person is at using CAD/CAM software for fabrication processes affects how much money it costs to use this type of software.

Another thing to think about is the amount of mechanical work. The cost of specialized tools and equipment can make it hard for fabricators to price their work. Make sure that you use a lot of force, heat, or pressure to cut or bend metal if you want the job done right!

5.Metal Structure

Sheet metal fabrication costs vary depending on the metal structure and design. Single-punch sheet metal products cost less than multiple-bend products. Fewer bends, cuts, and welds mean less money spent on your project.

Simpler designs and stricter standards take longer to create. Hence, the project costs rise. Many factors influence the cost of recruiting metal construction and design personnel. In some cases, design for manufacturing is required (DfM).

sheet metal

Tips for Cutting the Cost of Making Sheet Metal!

There are a lot of things to think about when it comes to the cost of sheet metal fabrication. Costs should remain low. You can save money on your project if you follow these rules:

1.Choose the Right Raw Materials to Make your Project Work

You can save money by choosing the right raw materials for your project. You need to choose the right materials to make sheet metal at a good price. Most of the time, material stock sizes are the best choice in this case. Another thing to keep in mind when you make prototypes is to use the cheapest materials you can get your hands on.

A good example of what to think about is aluminum, not stainless steel, but that might not be the best choice because pricing is the most important aspect to consider when picking materials.

Fabricators who buy their materials directly from the mill may be able to help with price talks. Why can they give you cheaper bulk prices? Because they know these mills and have a good relationship with them, they can do that. If you buy materials from the mill instead of at the store, you may be able to save money on shipping and storage costs.

2.Make Use of a Standard Sheet Metal Gauge

As much as possible, use the same sheet sizes and gauges used in other places. Sheets that are standard length are less expensive than sheets made to your own length. If the material is thicker, it may be more difficult to bend and cut your part. It will be more difficult to work with.

A common gauge and the current market conditions will be the best choices for your design. Use this method to save money on different gauges, use this method!

Many people ask for different types of steel sheet metal. Manufacturing costs go up when special-ordered materials are used. You and the fabricator must work together to set up a common standard. This will help you keep the cost of fabrication down.

3.Avoid Complicated Design Elements

Because of this, it costs more to make a complicated design than to make one that is simple. The cost of parts that have to be cut, bent, and welded goes up. Because they are so unique, design features may look great, but they cost a lot more money in the end. Most of the time, you should keep things simple.

If you make the angle bends in your design simpler, you will save money when you make them. For these bends, use inside radii equal to the material’s thickness.

In most cases, making small bends on large, thick parts is a waste of time. For this reason, it’s important that you stay away from them. Another way to cut down on the cost of making things is to keep the bend radius the same.

For example, only include blind holes or chamfered edges if they’re critical. As a result, lead times and production costs often get longer. If you use the right sheet metal design guide, your product will be a lot better off.

sheet metal

4.Consider Cost-Effective Finishing Options

You should think about how the piece will be used and how it will look when you choose a sheet metal finish. Even if you live in a difficult place, pre-plated metals will work for your needs.

When you need to weld a seam, pre-plated metals such as galvanized metals aren’t the best choice. You should also think about putting off the final stages of product development. This includes engraving and silkscreening.

Some materials are made to be resistant to corrosion from the start. Because of this, they don’t need a very personalized finish. It may be necessary to hire outside experts to figure out how much it will cost and how long it will take.

You can apply a lot of standard finishes for less money and less time. Finishes like chrome play, anodizing, and powder coating are easy to get and don’t cost a lot.

5.Get in touch with a Fabrication Expert

To get cheap sheet metal fabrication, look for a full-service fabrication shop. A corporation that can handle most of this work in-house should do it.

If you’re working on a project that needs to start from scratch, QBH Technology can help. As a result, there will be no need to pay more money or hire someone else to do the work.

As a sheet metal company, QBH Technology should be on your radar. You spent less money over time on a more efficient production method and produced a better-quality product. Also, you will meet the company’s goals on time if you work with a skilled fabricator.

6.Other Tips

Aside from the preceding suggestions, other sheet metal design choices save money. On the list:

Components having many functions tend to be more expensive. You can see radius, length, and diameter of the holes in these “callouts.” The surfaces of only a few parts should be critical. This is why it’s best to give those surfaces critical tolerances. The design will be cheaper if it doesn’t use as many tight tolerances.

Another way to cut the cost of making parts out of sheet metal is to use the best geometrics in the design. The material’s bend radius should be between 0.030 and 1x its thickness. Producing the radii is easier with equipment built fast for these geometries.

People who make sheet metal projects that use fancy fasteners are going to have to pay more and make less money. Consider fast and cheap fasteners. As a result, choose fasteners that are quick, cheap, and easy to find when possible.

Cost Estimation of Sheet Metal Products!

Today’s marketplaces demand a solid understanding of cost structure. Sheet metal fabrication includes cutting, roll forming, bending, welding, punching, and more.

Breaking down the production cycle – The process of creating a new product goes through several stages. The production stages might range from one application to the next and many phases. Breaking the cycle into smaller, more manageable steps is necessary. We may concentrate on one cycle at a time this way.

sheet metal

How to Calculate the Costs of Sheet Metal Fabrication?

The total cost of production, from raw materials to final assembly and delivery, is included in the fabrication price. To start, it is important to break down the production process. Determine the cost of the raw material, and then figure out how much it will cost to machine it, after that. When making things, this should be done at each step of the process.

Conclusion

One of the main considerations in developing sheet metal parts is the cost. You can reduce the sheet metal fabrication expenses by following the advice above. The price of fabrication services may differ from company to company. Some companies may offer it low while others at a very high process. Look for a reliable company that can provide a quality product at a reasonable price. The best one is just around the corner waiting for you.

QBH Technology is one of the trusted companies when it comes to CNC machining. They have well-trained specialists with a deep understanding of specialized sheet metal production. The company fabricates superior sheet metal components at competitive costs. Their products comply with ISO to assure the public only quality products are being offered.

QBH will help you optimize your design. They have a team of experts who can assist you in reducing the cost of sheet metal manufacturing. Get a free, no-obligation quote on your design now. Visit their page and submit your design.

分类
Blog

Tips and Methods for CNC Machining Titanium

CNC Machining is a computerized and automated tool used in the manufacturing process across various industries. A CNC machine can easily remove layers of material from the base stock piece through numerous operations such as drilling, turning, milling and others. All major industries such as aerospace, electrical, medical, defense, mining, etc. deploy CNC machined parts to increase production and efficiency. Being an automated tool, CNC machining has several advantages over manually operated machinery.

CNC Machines are specialized automated machines that have in the recent years revolutionized the manufacturing industry in the truest sense. CNC machines are the ones that companies deploy when they want mass production of mechanical parts with high levels of precision and accuracy. There are no limitations as such on what a well-programmed CNC machine can produce. It can make things out of plastic, wood, metal, foam and whatnot. CNC Lathe, Turners, Millers, Plasma cutters and Laser cutting machines are some of the common machines used in CNC systems.

One of the most preferred materials for CNC machining is titanium, owing to its superlative strength and versatility. Be it aerospace, be it military, or the field of biomedical, titanium is widely used to manufacture strong alloys. Titanium has a very high strength-to-weight ratio and is extremely resistant to heat and corrosion. Thus, it can withstand high amounts of heat, retain its strength at extreme temperatures, and at the same time perform well even in highly corrosive environments. Alloys of titanium with metals such as iron, aluminum, nickel, etc. help in the production of strong metals.

cnc machining

Advantages of Titanium in CNC Machining

  • High tensile strength
  • High strength to weight ratio
  • Non-magnetic
  • Biocompatible
  • Corrosion-resistant
  • Recyclable
  • Sustainable
  • Environment friendly

While these properties make titanium one of the most durable elements in the CNC machining process, they can also affect the CNC machining process if the manufacturing process is not well-planned. CNC machining using titanium is challenging but can be achieved by following a precise process with tips and relevant care.

Common Problems While Using Titanium in CNC Machining

Stiffness: Being strong, titanium tends to become stiff and as a result, it has more chances of suffering from springback and chatter as compared to other metals. As a result, the surface quality gets affected immensely.

Stickiness: The stickiness of titanium leads to the formation of tangles. A tangling chip of titanium sticking to a cutting edge may result in chipping of the tool, particularly during the cutting process.

Bad Heat Conduction: As titanium is very much resistant to heat, it becomes difficult to get rid of the heat accumulated while using titanium in the CNC machining process and may result in the tools getting damaged.

Long Chips: Titanium is known to produce long chips that can damage the tools. Long chips also act as a hindrance in transferring heat away from the workstation.

High Cutting Pressure: Titanium needs to be subjected to very high pressure during the cutting process. As a result, the cutter receives a strong shock every time before entering and after exiting the cut. If not controlled properly, it results in excessive chipping of tools.

So the question arises, how to overcome these problems caused due to usage of titanium in the CNC machining process?

If worked with patience, with the right tools, with the correct methods, and with the right expertise, one can overcome all the above-mentioned and other problems which arise due to the usage of titanium in the CNC machining process. Here we are sharing some of the most helpful tips and methods to use titanium effectively in the CNC machining process.

CNC machining

Tips and Methods for CNC Machining Titanium

1.Use Coolant

Titanium is a bad conductor of heat. As a result, the majority of the energy that is generated during the cutting process gets transferred to the tool instead. More often than not this results in tool failure affecting the work and increases the expense. So have the best possible coolant setup during the CNC machining with titanium which will bring down the temperature and increase the longevity of the tools.

2.Use a Stable Surface

A tool often experiences shock more so while entering and exiting the material. This affects both the tool and also the material. To overcome this, arc the tool inward in a gentle manner instead of inserting the tool directly. Doing this minimizes the shock on the tool, lowering the possibility of tearing on the material. At the exit point of the cut, consider forming a chamber that lets the tool lose depth gradually and eases the transition process between the tools.

Also, CNC machining using titanium involves extreme cutting forces. Thus it must be placed on sturdy and rigid equipment that can absorb heavy loads.

3.Use the Right Tools

If not planned well, usage of titanium in CNC machining may result in the wear and tear of the tools. A worn-out tool will not give us the desired result. Hence, make it a point to check and inspect the CNC machine parts and tools frequently before using them.

4.Keep Space for Tools

A metal should ideally have a breathing time between the cuts which is instrumental in increasing its life. Having a tool with a small diameter is an effective way of achieving this. A smaller diameter tool is more exposed to the air and the coolant which gives the cut edge more time to cool down.

5.Minimize Galling

Titanium can readily form alloys with other materials such as copper which can cause galling of the edges while cutting. To minimize this galling effect caused by titanium, it is a good practice to use lubricants and keep the heat level down.

6.Prevent Tool Pullout

A slight slip and there is a cut depth which you didn’t want. This then results in more slips creating a total mess of the machining process. Machining titanium involves cutting forces, shocks, and vibration. Titanium tends to grab the end of heavy loads and pull them out of the holder. This then causes broken tools. To overcome this, put two screws pressed against angled flats on the tool shank to wedge the tool against a stop thereby preventing it from pulling out.

CNC machining

7.Control Chipping

With each cut, the metal pieces being cut off compress and stick to the edge of the cutting tool. After several cuts, more metal pieces start building up on the cutting tool which results in damaged tools, poor cuts, and an output that is not satisfactory. Use a sharp tool and lubricants to control the chipping of edges.

Thus, even though titanium is an ideal metal for the CNC machining process, various aspects must be taken into consideration to ensure that there is no damage caused to the tools and the materials while getting the desired output.

The CNC machining process with titanium should be well-planned and optimized beforehand. Consider all the problem areas and deploy relevant methods well in place to overcome them.

Implementing the tips shared by us, right from managing the temperature to using the right tools you shall be able to have an ideal setup for the titanium CNC processing and attain optimum results.

分类
Blog

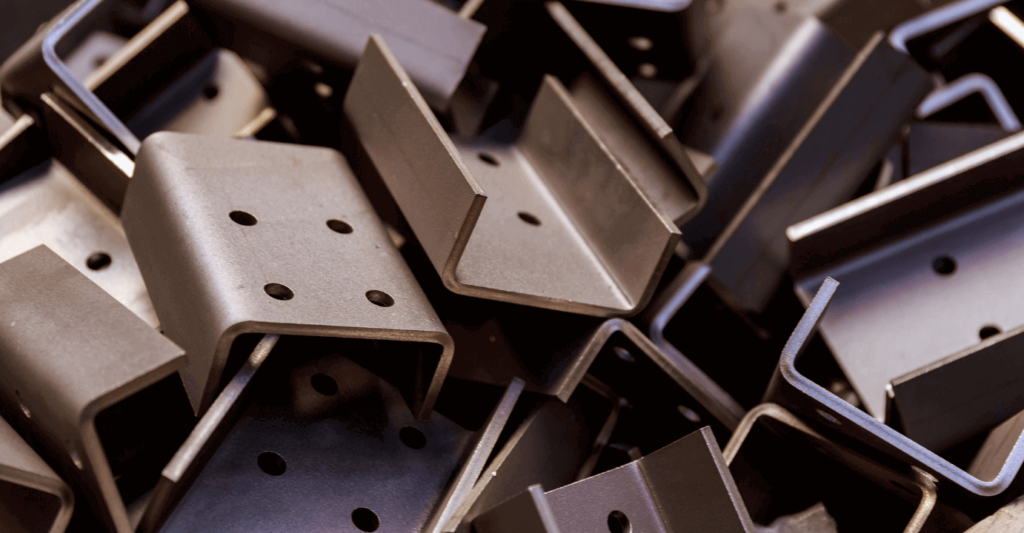
How To Make Custom Sheet Metal Bracket Styles?

Designing custom sheet metal brackets style is a demanding process. Although it is a backbreaking process. But provides the most important designing and appliances of metal sheet bracket styles. Additionally, This process provides you a variety of styles and shapes to design. Usually, Sheet metal is the most adaptable material for designing brackets style in the manufacturing industry. The sheet metal may be of aluminum, nickel, titanium, tin, steel, brass, or other metals.

For designing sheet metal bracket styles, there are many advantages to use sheet metal in the process. Because the sheet of metal offers significantly lower material cost.As well as, it gives beneficial usage to not only the non-metal alternatives, even other types of materials of metal fabrication as well.

Additionally, sheet metal brackets are present in a variety of styles. But, a specific style of sheet metal brackets is designing to perform specific requirements in the manufacturing industry. As well, metal sheets play a significant role in designing brackets style.

The major role of these bracket styles is mounting a component, compatible with a specific surface shape. According to the situation or requirement, specific bracket styles of sheet metal are designing in the manufacturing industry. Commonly, bracket-style is may introduce as it is an intermediate component. Which plays a role to fix one thing. For example, it may fix your shelf or wall, furniture sections commonly.

According to your tooling requirements, there may design different custom enclosures in the manufacturing industry. Whether as, a variety of bracket styles and custom standalone components may design according to customer order of requirements.

For the sheet metal bracket styles designing, In this process, there are many actions to do with a metal sheet. such as cutting, stamping, punching, shearing, forming, bending, welding, rolling, riveting, drilling, tapping, and machining. When metal sheets are performing all these steps in the fabrication process, it moves forward to the next door. Then, steps to do with components such as brushing, plating anodizing, powder coating, spray painting, silk screening, and marking.

Introduce yourself to metal sheet brackets, and their usage.

Metal sheet brackets are devices that built a collection between two objects. Brackets play an intermediate role in fixing things. Such as furniture sections, or flooring. Commonly, stainless steel, brass, carbon steel, and aluminum are significant metals. Which plays a significant role in metal sheet brackets in the manufacturing industry.

Although, metal sheet brackets are present in a variety of shapes in the industry. The most important and specific brackets are functional. Brackets have holes. Because these holes are helpful to feed them by screws or other fasteners. Best brackets provide functionality as they are responsible to build a connection and support between objects.

The major function of brackets is to provide support and connection between two objects. These objects may be flooring, shelving, countertops, or sections of the furniture. Brackets are also used for decorative purposes.

The common manufacturing process for brackets is casting and CNC machining. We can use the most important and best way to get simple brackets by a process. Which is sheet metal fabrication. Through, these manufacturing processes, we can get functional brackets.

The thickness of the metal sheet may vary.

In the Metal sheet bracket styles designing, the thickness of the sheet plate may be 0.9mm_ 20mm. The thickness of the metal sheet is according to the requirement of the final product in the manufacturing industry.

Sheet Metal

Types of metal sheet bracket  styles

The best way of designing metal sheet bracket styles is metal sheet fabrication. This process manufactures several types of bracket styles. Types of bracket styles are beneficial and useful according to their application. Manufacturing industries manufacture or design bracket styles according to specific requirements and bracket-style applications. Some common types of bracket styles are

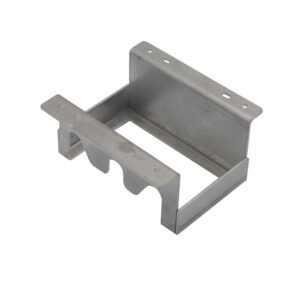
  • L-bracket
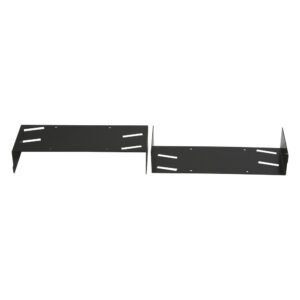
  • U-bracket
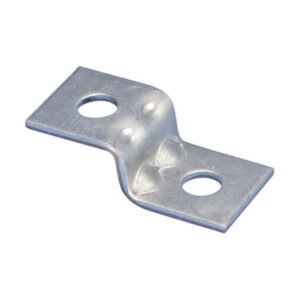
  • Z-bracket
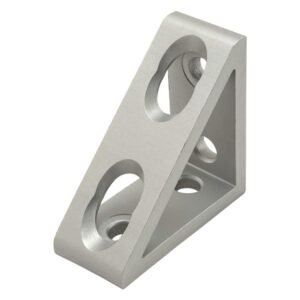
  • Gusset bracket
  • Offset bracket

Basically, the process of metal sheet fabrication or sheet metal bracket styles designing starts with a flat material. It is the non-additive and non-subtractive process of manufacturing. The protocase designing is the best way to quick and easy designing. In this process, in-house CAD software installation provides an easy way to designing of bracket styles.

All bracket-style are designing at a specific Angle. Many bracket-style need angles of 90 to 120. The angle of the bracket-style is according to its requirement of manufacturing. The metal sheet bracket designing process is according to the basic principle. As,  installation of software CAD, The 3D CAD files converting into codes. They are easy to understand by machine and working according to that code of language.

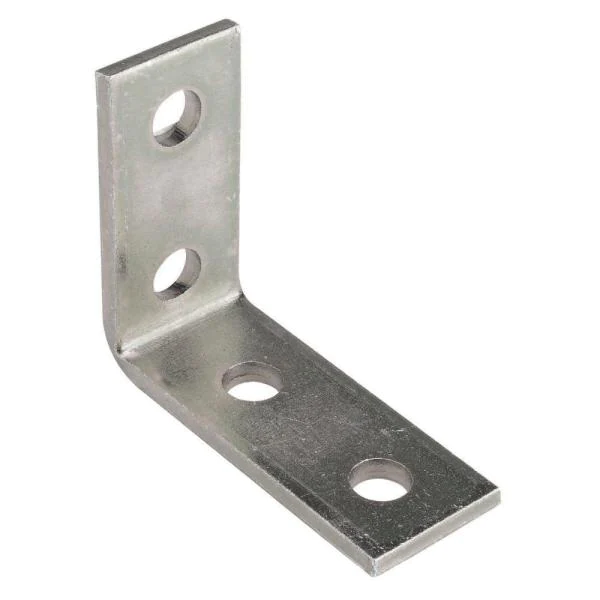
L-bracket

It is a common type of bracket style. It looks like the L alphabet. As its name indicates. In L-bracket often bending along a single axis, there creating 90°angle. L bracket application is to capture objects according to their shape of manufacturing.

U-bracket

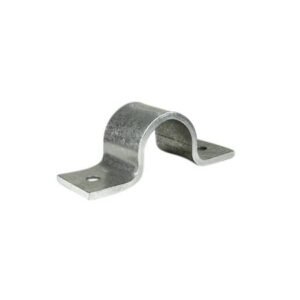
It is also a common type of bracket-style designing, by U-shape.

There is bending along 2 axes. U- brackets play a significant role to grip an object or mount parallel objects.

Sheet Metal

Z-bracket

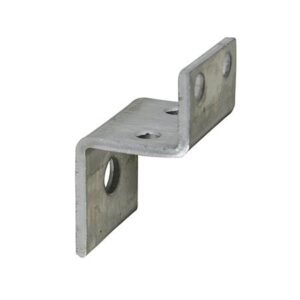
It is a specific shape bracket that looks like the Z alphabet. This bracket bend one flange inward and another outward making a profile of Z shape. It is specific to its applications.

Sheet Metal

Gusset bracket

It is a type of bracket that has load-bearing capacity. You can do welding to the gusset bracket, or maybe applicable as a single piece.

You may design a gusset bracket in any size according to the requirement of your application. It may do some extra welding to the gusset bracket for your specific application. That will provide you with some extra support for the components.

Sheet Metal

Offset bracket

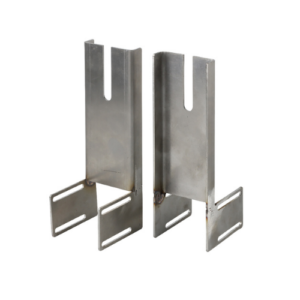
It is a similar style to the Z-bracket. It plays an important role in mount parallel objects. You may contain components by offset bracket. 

Sheet Metal

Bracket styles designing purpose is to support two objects in the same plane. A flat bracket is the name of the transformer strap. It is a type of bracket that can help both square and radius ends. As well as, round or slot holes in it.

Angle bracket is also a type of bracket-style. Application is to hold two perpendicular objects together in a specific assembly and strengthen the angle.

Along with, these types of bracket styles. There are many other types of bracket styles. That is specific in their range, tolerance, application, and requirement. All bracket styles are specific in their applications. Such as,

  • Flat bracket
  • Angle bracket
  • Mounting bracket
  • Terminal board bracket
  • Offset bracket

Features of  sheet metal  bracket styles

Metal sheet bracket styles may vary in thickness range. such as it may be from 0.9mm-20mm. It provides the ability of manufacturing from a sheet ( <3 mm) or for metal sheet brackets plate (>3mm).+/- 1 degree of tolerance is commonly acceptable in manufacturing industries. It depends on the manufacturing of specific products. Bracket styles provide you a huge variety of shapes. Which are perfect for their design and application of usage.

There are holes in bracket styles. These holes may be round shapes or square shapes according to requirements and applications in the industry.

This provides an easy way for fasteners for working and drilling through the point of mounting. If you want to design bracket styles. You should use the protocase designing process. In this way, CAD software installation provides you an easy way to designing custom bracket styles.

In the manufacturing industry metal sheet, brackets styles have specific features and functions according to their manufacturing purpose. Such as,

Angel bracket style1,2 contain round holes and square ends .or round holes with radius and square ends. It’s all according to their styling in the manufacturing.

The mounting bracket contains slot and round holes radius and square ends.

Sheet Metal

Important instructions to designing custom sheet  metal bracket styles

If you want to control your costs while you are designing bracket styles. There are some basic tips for designing bracket styles. You should follow these important instructions to do so.

While you are designing sheet metal bracket styles. Keep in mind if your hole pattern is symmetrical, Then you should keep spacing according to it. If you want to design some specific holes pattern. Then you may require a specific hole pattern, that is a matching pattern.

These specific patterns of holes may increase the costs of metal sheets in the process of fabrication. You should keep your designing simple and symmetrical.  Use protocase designing to design bracket styles. From all types of bracket styles, L-bracket is easy to design and low in cost.

You can do designing of metal sheet brackets with the best CAD software installation. But there are important things to keep in mind while you are creating a design by metal sheet fabrication.

Commonly, bracket-style of   L shape would be designed with an angle of 90° in an easy way. You can create the design at different angles which are more than 120 degrees. However, keep in mind less ductile metal articles and order to the bend.

If you have any questions or confusion. You are free to plz ask in the comment box. And leave a reply. We will get back to you as soon as possible. Thank you

分类
Blog

CNC Prototyping : A Detailed Cost Breakdown

CNC prototyping machining has a reputation as a cost-efficient manufacturing process. In the world of start-ups, cost-efficiency is a key requirement for prototyping. But when you try to research the actual cost of CNC prototyping, you get contradictory results.

Some hail CNC as the only affordable prototyping option. At the same time, others find the process to be an overpriced and impractical choice.

We decided to help clear the confusion by breaking down all the cost factors associated with CNC Prototyping. 

The Cost of CNC Prototyping

Calculating the cost of CNC prototyping is a difficult process. Particularly, because CNC isn’t one type of manufacturing, it’s a whole category of machining. CNC machining is a broad term for machining where a computer system controls the cutting tool.

CNC machining is a time-efficient process, so it’s universally preferred for prototyping. But time-efficiency and cost-efficiency are two separate metrics.

Eight key factors affect the cost of CNC prototyping and can be further divided into two categories,

  1. Design Related Costs

2. Machining Related Cost

Design Related Costs

Design is the first step in any manufacturing process and the first factor in the cost calculation. To make this calculation easier, we can take 4 aspects of design and analyze their cost individually.

1. Complexity Cost

Design complexity has the biggest impact on machining cost, and simple designs are easier to machine and take less time to machine. In comparison, complex designs are the exact opposite.

The most obvious reason for the increase in machining cost is equipment; complex designs require expensive and more elaborate machines. Additionally, some designs demand more than one machine and using multiple machines for a single part increases both time and equipment costs.

For example, the cost of prototyping a drink coaster design is very low. Because all the machining can be done on a basic 3-axis CNC Mill, however, if you’re prototyping a turbine blisk, the cost would shoot up‌. First, we need a much more expensive 6-axis CNC Mill. Second, if there is a single mistake during the machining process, the entire part becomes useless, so you need to machine this part ‌slowly and carefully.

Note: The cutting tool in a 3-axis machine can only move in the X, Y,& Z-axis. But the cutting in a 6-axis machine can move and rotate in the X, Y, & Z-axis.

CNC Prototyping

2.Tolerances Cost

Another element of design that is closely related to design complexity is Tolerance. Tolerance is the leeway in the precision of a design. Standard CNC machining tolerance is typically ±0.005 inches. To give you an idea of this precision, the average thickness of human hair is 0.002 inches.

For example, if you want to prototype a 2 in. square out of an aluminum block. The square might end up either on the smaller side at 1.995 inches or on the bigger side at 2.005 inches with standard tolerances.

Faster machining will have rougher Tolerance, like ±0.030 inches, but it will decrease machining costs. Meanwhile, tighter Tolerance like ±0.001 inches is only possible with slow and careful machining, which will increase the cost exponentially.

3. Material Cost

Material is the most obvious contributor to design cost; more expensive materials will result in more expensive parts. But let us discuss the details of this cost increase.

Firstly, let’s discuss high-strength materials; they require stronger cutting tools, longer machine times, and extra coolant because they generate a lot of heat when machining.

Secondly, rarer materials cost more; the simple rule of supply and demand is that the less something is available, the more it will cost. If you want to prototype a piece of jewelry using a rare weather metal like silver or gold, the machining cost will depend on the current market price of those materials.

Lastly, materials with special properties also add to the machining costs. Rare alloys, like corrosion-resistant or heat-resistant steel, need to be specially ordered, and manufacturers typically don’t keep these rare materials at hand.

4. Finishing Cost

After machining, the prototype will typically require some level of post-processing called finishing. The three most common types of finishing are anodizing, powder coating, and polishing.

Finishing is almost a necessity because CNC can often leave machining marks, which are undesirable in many cases. Powder coating covers these marks with paint, while polishing removes a microscopic level of material from the part for a smooth surface finish.

Machining Related Costs

All the previously discussed cost factors are related to the design phase. Consumer decisions impact the design costs, but manufacturer decisions determine the machining costs. Machining costs directly result from design choices, so manufacturers are only trying to adapt to customer specifications.

5. Type of CNC Machine

The choice of a CNC machine depends upon a few of the previously discussed factors. We talked about 3-axis and 6-axis CNC Mill, specifically how the cheaper 3-axis milling machine is better for simple designs. But design isn’t the only factor that dictates the type of CNC machine used for prototypes.

CNC machines come in all shapes and sizes and with different cutting tools. CNC Laser cutters, Plasma cutters, waterjet cutters, and Electric discharge machines are some alternatives to milling machines. Depending on your design complexity, tolerances, and material choice, you will require one of the above machines.

6. Economies of Scale

Economies of Scale describes the cost advantage of the increase in production output.

Any machining will involve some pre-processing and post-processing steps. Steps like material management, CNC machine setup, machine calibration, and tool change are compulsory when machining one prototype or a dozen prototypes. When machining multiple prototypes, all prototype units can be pre and post-processed together to reduce lead times.

Inversely, the fewer units you order for prototyping, the more each unit will cost.

7. Labor Cost

Labor is one of the most important cost factors, yet most consumers often ignore it. Yes, CNC machines are automated, but that doesn’t mean they are free from human oversight. Manual labor is still an important part of any manufacturing industry, and CNC machines require setup, calibration, maintenance, and general oversight.

Employees are paid monthly, meaning they are paid for their time. So, if a worker spends more time on a prototype project, it will increase the cost. And higher-skilled employees are paid more, so their time is worth more.

8. Lead Time

Lead time is a manufacturing term referring to the period between the start and the completion of a project. For CNC Prototyping, this period starts from the moment you agree to the quotation and ends when you receive the finished prototype.

Companies have spent an enormous amount of money optimizing their lead times. Longer lead times will result in fewer complete orders each month. Additionally, the prototyping process often includes a lot of design revisions which further increase the lead time and cost.

CNC Prototyping

How to Reduce CNC Machining Costs?

Technically you can reduce the cost of CNC machining by compromising on any of the factors mentioned above. But realistically, you cannot change all the factors to get the minimum possible machining cost. At best, you can reduce cost by finding concessions on one or two factors.

Practical Cost Reduction Factors

Some factors have more room for cost reduction than others. Following are the four most important factors which can help you reduce CNC machining costs.

Material Choice

Material is the most obvious choice for reducing machining costs, and Luckily, CNC machines support many metallic and non-metallic materials. So, with proper research and due diligence, you can find a material that is best suited to your product but also is inexpensive.

Material choice is particularly important for prototyping because prototypes often don’t need to be made from expensive materials.

For example, prototyping a propeller requires stress and aerodynamic testing. Stress tests will require the prototype to be made from the final material, like aerospace-grade aluminum. However, for aerodynamic testing, the prototype can be machined from plastic.

Part Complexity

Part complexity is a difficult factor to manage because most prototypes don’t allow for changes to the design. But if you can simplify your design even a little bit, it will yield lower machining times, defect rates, and lower costs.

Order Size

Order size is the simplest way to reduce prototyping costs.

For example, let’s consider the previously discussed Turbine Blisk. CNC Prototyping one Turbine Blisk will require some pre-processing and post-processing steps, which add to the machining time. And since it is a necessary step, the cost impact is unavoidable.

But if you decide to place an order for three Turbine Blisk, the processing cost of the first unit will remain the same but will be neglected for the second and third unit. The three parts will be machined back to back; they will share the same pre-processing steps.

CNC Prototyping

Finishing Options

Finishing is an important step for CNC machined final products. However, prototypes don’t require product finishes. You can reduce the machining cost by opting out of any post-processing. The industrial terms for non-post-processed parts are “as-machined” or “as-milled.”

Impractical Cost Reduction Factors

Despite what is theoretically possible, some factors should remain uncompromised and are not viable options for reducing machining costs.

Labor 

Underpaying workers to reduce your machining costs would be highly unethical. Also, underpaid labor will result in less effective workers.

Tolerances

Though tight tolerances are not essential for many prototypes, compromising on tolerances can negatively affect the part integrity.

Machining Type

Machine type is closely related to material choice as some materials are tied to certain machines. Unfortunately, changing the machine type is not possible in most situations.

Lead Time

Lead time is almost impossible to decrease without a significant impact on the quality of the part. Lead time is something a manufacturer can optimize but not something a consumer should force to shorten.

Conclusion

After reading this entire breakdown, we hope that you have a clear understanding of CNC prototyping costs. Now you can easily estimate the cost of a prototype by looking at the contributing factors. Remember, you can only reduce the cost to a certain extent; any further concession will result in a loss of prototype integrity.

If you are in the market for quality CNC prototyping, we highly recommend you check out QBH Technology. We offer various CNC machining services, with exceptional quality and precision. Our most popular services include Laser Cutting, High-Quality Welding, CNC Milling, and CNC Turning.

Send us your designs and specifications to get a customized quote for prototyping services. We will get back to you with a quotation, typically within 24 hours. Lead time and other details are mentioned in the quotation.

Contact Us Now!

分类
Blog

What is Galvanizing? The Benefits of Galvanized Sheet Metal

The process of coating a thin layer of zinc on the surface of iron or steel to protect these from rust.

This layer protects the metal in the following ways:

(1)This layer works as a barrier and doesn’t allow the moisture or air to come in direct contact.

(2)If the layer is broken down it also protects by creating an anode.

Methods of galvanizing:

Galvanizing can be done by any of the following methods.

Why is galvanizing done:

Galvanizing is done to protect the surface steel or iron from pre-mature rusting.

What is rust:

Rust is an oxide of iron that is formed on the surface of the steel due to moist air. Actually, rust is red flasks of iron oxide which are porous. These iron flasks do not stop the further rusting because moisture can pass through them and a whole piece of steel may be destroyed if not protected.

Pre-galvanizing:

This is the primary method of galvanizing. The metal sheet is rolling with a cleaning agent like mineral acid (hydrochloric acid) and then dip in the hot molten zinc bath and immediately recoil. This method is beneficial as the coiling steel sheets can be galvanized rapidly.

Electro-galvanizing:

In this method, the sheet of steel is an anode, and zinc solution act as an electrolyte. when the electric current pass through the solution zinc ions reduces to form zinc metal. Finally zinc metal deposits on the surface of the steel. This is an initial step performance during the time of production.

Galvanized

Hot-dip galvanization:

This is the simplest process of galvanizing. The process intimates the dipping of metal sheets in the melted hot zinc metal bath.  It has three following steps.

In step one, the metal is cleaning a base metal chemically or mechanically. Until all the flasks are finishing from the metal.

In the second step, the base metal is dipping in the hot melted zinc. The temperature kept for this purpose is more than 800 oF. Zinc metal and base form a metallurgical bond between them.

In the third step, the metal is pull-out from the zinc metal bath. The zinc layer reacts with oxygen from the air to form zinc oxide. Zinc oxide further reacts with carbon dioxide to form a final protective layer of zinc carbonate.

Galvannealing:

This is actually an alloying method. In it, metals are alloyed to get the required materials. This is the method of combining annealing and hot-galvanized metal. In this process, a particular layer of zinc is the deposit on the surface of the steel. The galvannealing process use by hot-dipping and instantaneous annealing produces a matte grey finish.

Galvannealed steel is a zinc-iron alloy product. In this, the metal is first coated by the hot-dipped process and then heated to get alloying between zinc and steel. The resulting finish is a sluggish matte surface.

Benefits of galvanized sheet:

Galvanized sheets of metals like iron or steel are widely in industries and in daily life.

Following are some uses of galvanized sheets:

  • Sunshades
  • Covers of buildings
  • Furniture covers
  • Framewear
  • Balusters
  • Packing sheets
  • Toys covers
  • Electronics covers

Availability and versatility:

Hot-dip steel is versatile and readily available. Galvanizers are present in the north-America. They produce a variety of shapes and qualities, sizes can hot-dip galvanized 24/7/365-rain or shine.

Furthermore, zinc solidifies immediately when it is removed from the bath so there is no delay when schedules are tight. On the other hand galvanized sheets are saves very easily, even in the open environment because ordinary environmental factors have no effects on the galvanized sheets.

Hot-dip galvanized steel prepare from two naturally occurring primary components i.e iron (steel)  and zinc. Iron is the 4th abundant metal that exists in the earth’s crust while zinc is the 24th abundant metal.

Galvanized

Low cost:

This process is not so expensive. We can prepare iron or steel sheets at a low cost. These are readily useable when delivered. There is no need to give them extra time or money like coloring, polishing, etc.

Longevity:

A piece of the sheet that is galvanized contains a very long life. These sheets may have 50 years of life in ruler and normal urban areas. If used in a moist environment its life span is about 20 years. If galvanized metal is present in building materials it will give comfort for many years. It also increases the appearance and durability of the steel.

Galvanizing gives great value for money:

Galvanized sheets of steel prepare at a low cost. These are prepared with high quality,  minimum time, and are readily available for use. This is done by a very simple process as the hot-dipping method.

If we use some other methods or alternative methods are costly and they take a long time to utilize them. Like a painting is a much more time-consuming and laboring process.

Galvanizing is the authentic, systemized process:

Galvanizing is a fast, simple, and environment-friendly process. There is no production of any pollutants or contaminants during this process. There is a clear standard in the thickness of the coating on the metal sheet. A very thin layer of zinc makes a reliable connection with steel and makes its durability long-lasting.

Also, zinc makes a very strong bong than any other chemical or mechanical bond. Zinc metal becomes a part of base metal, making it extraordinarily resistant to damage.

Hardness:

The metals after galvanization become very rigid and hard. So we use these sheets in the manufacturing processes. Where we need very hard structures. Such as:

  • Stairs
  • Terrace
  • doors
  • Windowpane
  • Marquee
  • Building frames
  • Canopies
  • Ductwork
  • Handrails
  • Fences
  • Industrial walkways
  • Step ladder
  • Staircases
  • Street furniture
  • Support beams
  • Sunporch

Sacrificial anode:

If the coating of zinc on steel or iron is breaking up this acts as an anode. The anode protects the inner metal from rusting. If the rusting starts then the zinc metal will crude first so this is acts as sacrificing anode.

Galvanized

Rust protection:

The elements of iron present in the steel are improbable to rusting. But when the zinc is mix in the steel the zinc protects the iron from rusting by keeping the moisture away. Galvanized steel is very protective and has sharp corners. Any other metal can’t protect the iron like this.

Electronics:

The casing of most of the electronic appliances forms from the galvanized sheets. Computer casings are generally forms from galvanized sheets. As galvanized sheets protect from moisture.

Environmental friendly:

Galvanizing processes and sheets are environmentally friendly as there is no production of any pollution. Zinc exists in nature. It is also a compulsory component for the normal growth of animals, plants, and microorganisms. Zinc is a trace nutrient for the normal growth and reproduction of humans. Its production didn’t cause pollution. Both the components i.e iron and steel are 100 % recoverable or recyclable.

For using the galvanized steel there is no need for extra maintenance. maintenance-free Longevity means there is no need for extra resources for its maintenance and protection. Eliminating maintenance only produces zinc products. These products are already present in the environment. These zinc products don’t have harmful effects on the life present in that environment.

Sustainability:

Sustainability is the capacity to endure in a relatively ongoing way across various domains of life. It is a social, environmental, economic commitment to growth and development that meets the needs of the environment without compromising. As the social pressure continues to develop a demanded quantity of material. Hot-dip galvanizing provides maintenance-free, environmentally friendly, galvanized steel, beneficial for future generations.

Piping :

Galvanized piping change the concept of piping from cast iron to galvanized piping in the 20th century. The cast iron piping causes the mixing of rust and other chemicals in the water supplies, proximity to the electrical grids, whether the piping is covering inside or outside with zinc metal.

To increase its longevity galvanized pipes are joining with epoxy resins. Which is a chemical compound that comes from petroleum. Epoxy provides strong adhesion, flexibility, and strength.

Playground equipment:

Playground equipment is made up of galvanized pipes or sheets because these are rust-free. Like bicycle racks, jungle gyms, etc.

Transportation:

Cars, aircraft, bicycles are more consuming machinery of galvanized equipment. The uses of galvanized sheets in other industries are as follows:

  • Hoods
  • Fenders
  • Parking brakes
  • Seating
  • Spring housing
  • Roofing
  • Oil pans

Wire-rope:

Wire-rope is a highly stressed component and hot-dipped sheets may reduce the strength of the steel due to hydrogen embrittlement. So the steel becomes brittle.

To solve this problem we use stainless steel in the manufacture of electric cables, bindings, etc.

In short galvanizing protects from corrosion, rust, moisture, and scratches.

Galvanized sheets are everywhere:

Galvanized sheets are very popular in almost all industries. You will find galvanized sheets everywhere on your work or in your households. Galvanizing is a low-cost trustworthy method to increase the life of your metal. select the method which suits your work and talk with your contractor to ensure the life of your metal. Some industries which are widely using these sheets are as follows:

  • Telecommunication
  • Construction
  • Solar industries

If you have any confusion or question. You are free to please ask in the comment box. And leave a comment. We will get back to you as soon as possible. Thank you.

FAQs

How the Galvanizing protects the underlying iron or steel?

  • The zinc coating, when intact, prevents corrosive substances from reaching the underlying steel or iron.
    • Additional electroplating such as a chromate conversion coating may be applied to provide further surface passivation to the substrate material.
  • The zinc acts as a sacrificial metal to protect the underlying iron/steel and thus acts as a sacrificial anode. In the event the underlying metal becomes exposed, protection can continue as long as there is zinc close enough to be electrically coupled. After all of the zinc in the immediate area is consumed, localized corrosion of the base metal can occur.
分类
Blog

Aluminum for CNC Machining: Know the Benefits, Drawbacks, and Alloys

Introduction

Aluminum is the second most prevalent metal, after iron, to be processed in all kinds of manufacturing industries. Due to its high machinability and strength, aluminum is widely CNC machined to make thousands of different types of products. From lighting fixtures to spaceships and aircraft, aluminum alloys are used in almost every industry.

Aluminum offers many benefits in CNC machining. This article will discuss the properties that make it unique, applications, aluminum alloys best for CNC machining, and the advantages and disadvantages of using aluminum in CNC machining.

CNC Machining

Characteristics of Aluminum

Pure aluminum is silvery-white in appearance, non-magnetic and ductile metal. It is mainly alloyed with other metals such as copper, manganese, and magnesium to enhance the corrosion resistance, strength, and other properties that are required in machining.

 Abundantly found in the earth, it is the second most prevalent metal in the manufacturing industry. Due to its recyclability, aluminum saves almost 95% of the energy and forms a big part of our world’s infrastructure.

Aluminum’s non-toxicity opens doors for its use in medical applications and food packaging and storing. May it be kitchen foil, food cans, or utensils, aluminum poses no harm to the end consumers.

Low density, great malleability, and high thermal conductance make it suitable for transmission lines. It’s better than copper in many ways, such as being cheaper and offering better electric conductivity.

You will find aluminum in your cola cans, household appliances, windows, furniture, cars, building structures, medical devices, airplanes, spacecraft components, trains, ships, and much more.

Figure 1 Courtesy: Statista.com

Comparison with Steels

Steel and aluminum have the biggest share in the manufacturing sector. While steel is known for its excellent strength, malleability, ductility, and corrosion resistance, aluminum comes on par with it due to its high strength-to-weight ratio.

Although aluminum has high corrosion resistance due to its ability to form a protective oxide layer on top, it still cannot beat the corrosion resistance offered by chromium in stainless steel. Moreover, aluminum has quite a low melting point of 600°C compared to steel ~2500°C.

Many alloys are formed by just a slight alteration in the compositions of the added metals in aluminum. We will discuss alloys of aluminum later in this article.

Steel takes the lead because of its economic viability. One pound of steel is cheaper than a pound of aluminum. However, currently, both metals are extensively utilized in their respective industries.

CNC Machining

Advantages of using Aluminum for CNC Machining

Aluminum is a lightweight material with a solid strength to mass ratio. This characteristic is already enough reason for most parts to be manufactured using aluminum. But when speaking about CNC machining, aluminum provides many extra perks in manufacturing. Like easier workability, faster machine times, and better finishing.

Following are a few advantages of aluminum concerning CNC machines.

Rapid Prototyping

Rapid prototyping is the practice of fabricating parts, models, or samples quickly using CAD. Aluminum is a softer metal and can be machined swiftly. CNC machines further increase the efficiency of this process.

Prototyping is a multi-step process, with a single prototype will undergo lots of small changes. Each change comes with a new iteration of the prototype. And the time spent machining every new iteration will add up. Time is money, and time wasted can drastically hinder the development of a product.

Since time is an essential factor for prototyping, aluminum is the preferred material for such endeavors.

Recyclability

Aluminum is insanely cost-effective when recycled. CNC machines can quickly remove a lot of material from a block of aluminum. But that removed material is now in the form of chips and shavings, essentially useless. Recycling these chips can help reduce the cost.

Recycling aluminum is a highly efficient process. It requires way less energy to recycle compared to other metals. Aluminum’s ability to avoid rusting allows chips from CNC machines to be stored without fear of corrosion.

Corrosion Resistance

Corrosion comes in various forms; the most common one is rust. Iron and steel are notorious when it comes to rust; even small amounts of moisture can cause corrosion. But aluminum doesn’t have this issue. Because aluminum reacts with oxygen to form an aluminum oxide on its surface, this thin layer acts as natural protection from all manner of corrosion.

It’s a common practice to manufacture complex parts using CNC machines. The parts often have crevices or cavities that are corrosion-prone.

For Steel parts, it is necessary to coat them with corrosion-resistant finishes. Upon failure to do so, rust sets in these crevices. And it becomes extremely time-consuming to remove rust from said crevices. Corrosion like this is, of course, not a concern when dealing with aluminum.

Strength to Weight Ratio

Aluminum is famous for its incredible strength and low weight. This particular property is the reason behind aluminum’s widespread use in manufacturing. A high strength-to-weight ratio means you can manufacture the same strength parts but using less material.

This lightweight property not only helps you reduce the cost of manufacturing because the less raw material is required. But it also reduces shipping costs because of the lower weight.

The aerospace industry especially loves lightweight materials. Modern rockets require thin aluminum shells to reduce weight. Unfortunately, at that thinness, aluminum loses most of its strength. This is where CNC machined aluminum plays an important role.

Thin support structures are machined directly into the aluminum slabs. These support structures vary from design to design. But they compensate for the thinness by providing additional reinforcement. This is a delicate and precise process that can only be done using CNC machines.

Alloy Versatility

There is an extensive range of aluminum alloys available for CNC machining. Aluminum alloys can significantly boost the base specifications of pure alloy.

Pure aluminum is very soft and has a tensile strength of only 90 MPa. This property can be increased up to 600 MPa for certain aluminum alloys.

Some aluminum alloys are heat treatable, like 2000, 6000 & 7000 series. And others like 1000, 3000, & 5000 series are non-heat-treatable. Only the 4000 series of aluminum alloys contain heat treatable and non-heat-treatable alloys.

Though all of these alloys are CNC machinable, it’s best to select the suitable alloy according to desired properties carefully.

Disadvantages of using Aluminum for CNC Machining 

Aluminum has a lot more benefits than drawbacks. However, all factors should be considered when selecting the suitable material for machining. The few shortcomings of aluminum can render it useless in specific applications.

Following are two significant drawbacks when CNC machining aluminum.

Thermal Properties

Aluminum has a lower melting point than steel and twice the thermal expansion coefficient. Both these properties reduce the operating temperature range for parts made from aluminum.

Poor Thermal properties can negatively affect the CNC machining of aluminum. The low melting point causes the fusion of material due to friction.

Alloy Confusion

The sheer number of aluminum alloys can confuse a novice operator. Understanding aluminum alloys is a necessity for CNC machining. Alloy often increases one characteristic while decreasing another.

For example, Aluminum 7075-T6 has high tensile properties but sacrifices ductility and corrosion resistance.

What Aluminum Alloys can be CNC Machined?


Aluminum has a wide range of alloys, with varying properties. Nonetheless, these alloys are still aluminum. A softer metal with a low melting point. Therefore, theoretically, all alloys of aluminum are CNC machinable.

 Some alloys may require a harder tool to cut than others. All aluminum alloys have pretty much the same modulus of elasticity. But their tensile strength will vary drastically. And for CNC machining, the more relevant property is hardness.

 Hardness is a material property to resist local deformation. Deformation such as scratches or indentation. Harder materials require harder tools to cut. So, aluminum alloys with increased hardness will be more difficult for CNC machines.

CNC Machining

What are Aluminum Grades?

Aluminum alloys are categorized by their additives. Magnesium, copper, and silicone are the three most commonly used materials in aluminum alloys. The names of alloys do not represent the percentage of portions of these materials.

 The name conventions are set by organizations; different organizations will have different prefixes but the same number. The sole exception is the ISO standard, which uses chemical notations.

For example, Aluminum 6061 is labeled as,

[Aluminum 6061 naming standards]

Aluminum Alloy designation system

Aluminum alloys are designated as 4-digit series ranging from 1000 to 8000. The first digit represents the primary constituent of the alloy. The second digit is for the modification to the series. And the last two are for placement of the alloy in the series.

 For Example, Aluminum 2195, “2” represents the 2000 series, which is copper-based. The “1” shows this is the first modification on the 2095 alloy. The “95” here is a unique identification in the series

As such Aluminum 2004 and 3004 have no similarities despite the common 04 in the name.


[Aluminum Alloy Series Table]


Aluminum alloys also have a suffix at the end to designate post-processing. The “H” suffix is for designating the strain hardening and the “T” suffix is for designating Thermal Treatment.


[Aluminum Alloy Suffix Table]


For example, Aluminum 6061-T6 is magnesium and silicon alloyed aluminum that has been heat-treated and aged.

Table-Comparison of Different Al Alloys


Following are a few commonly used aluminum alloys for CNC machining.


[ALUMINUM ALLOY CNC TABLE]


It’s best to use the alloy most suited for your application. Aluminum alloys can be expensive, especially for higher strength variants. The most commonly used alloys for CNC machining are the 2000 and 3000 series alloys. With the 6000 series being only used for high-performance applications.

It’s best to double-check the compatibility of your CNC machine with the desired alloy.

Post -Processing of Aluminum after CNC

Post-processing of machined jobs includes finishing, treating, painting, polishing, etc. They are many such processes that are done according to specific requirements of clients.

Post-processing of Aluminum products is used to further enhance the products and improve their market value. Here we have jotted down some popular Aluminum post-processing treatment methods:

Aluminum Oxidation

The oxidation process is done to strengthen the aluminum. This increases the resistance to wear of the Aluminum product. Oxidation process is done by an ionic chemical reaction on the surface of aluminum with oxygen in the air.

Aluminum Finishing

Surface finishing of the aluminum product is done to remove debris, sharp edges, and overall aesthetics of the product. There are multiple types of the finishing process.

Machined

This is done by grinding the aluminum job with a high-speed rotary disc. Sharp-edged is removed, and strict tolerance is met.

Powder Coating

Aluminum products are primed by phosphate/chrome coating, which enhances their corrosion resistance. Now the parts are powder coated by an electrostatic sprayer. The finished product is baked in an oven at 200℃. Powder coating gives the final product a unique shine, smooth surface, and enhanced durability.

This coating also gives a unique protective layer that saves aluminum from rust. You may want to increase the thickness up to 72um for an extra finish. However, it decreases the dimensional control of the product.  

Anodizing

Anodizing- an electrochemical process that increases the thickness of a part’s natural oxidation layer. This new thicker and more dense layer increases durability, electric non-conductivity, and corrosion resistance.

Keep in mind anodizing can only be done on good conductors like titanium and aluminum alloys. It involved submerging the part in a sulphuric acid bath. The aluminum part act as an anode, and the cathode is present on the other side. The movement of ionic charge happens when an electric current is passed through, and the deposition of oxidation layers starts to happen.

Anodizing process gives the most aesthetically elegant finish to the product, but it is expensive compared to other processes.

Bead Blasting

Bead blasting is typically done to apply a matte or silky finish to the aluminum part. As the name suggests, millions of glass beads are blasted through a pressurized gun onto the part. It creates a consistent granular finish.

Remember, it does not enhance any physical material properties of the aluminum product. Everything is purely visual. Bead size and grade are also important factors to consider.

Aluminum Paint

Aluminum products are either painted with liquid paints or a spray gun. This adds resistance to corrosion and rust. It also makes the product visually appealing.

Aluminum Polishing  

Polishing is done to further refine the surface of the product. It is similar to aluminum finishing, but it goes even further to put a protective layer of corrosion-resistant material over the surface. Extra shine that it produces increases the visual appeal.

Aluminum Conditioning

Aluminum conditioning is the process done prior to electroplating processes like anodizing, used to eliminate any impurities from the metal, which may cause hindrance in further processes. Impurity is just a fancy word for dust and sand etc. Use alcohol pads to clean it effectively.

Best Aluminum Alloy for CNC Machining

Aluminum Alloy 6061-T6 is our pick for the best aluminum alloy for CNC machining. Why is that so? Because its most popular alloy in the market, easily available at the best prices. It’s versatile and has suitable material characteristics for product manufacturing. 6061-T6 has a good weight to strength ratio and is best for use in low to moderate stress applications.

Conclusion/Call to Action

Now you know how aluminum plays a vital role in revolutionizing the manufacturing industry. Many fields like Aerospace and Automotive transitioned further due to the fantastic properties of aluminum. We have covered all the aspects related to aluminum and its alloys. There is no doubt aluminum alloys are remarkable for CNC Machining.

Here at QBH Technology, we provide vast CNC services for aluminum alloys. Our high-tech machinery delivers high-quality products in short lead times. Want a custom part? Don’t know where to start? No worries, we are here to guide you at all stages. Our list of services includes CNC machining (lathe, mills, etc.), high-quality welding, precise laser cutting, and much more. All at competitive market prices.

So, Contact US NOW!
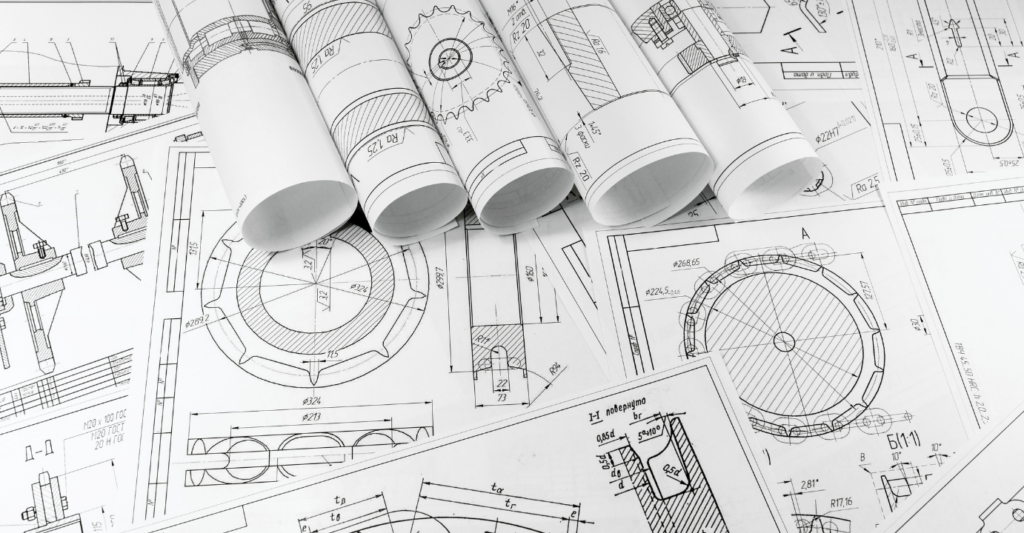
分类
Blog

Anodized Aluminum Colors: Coloring Aluminum Products!
CNC machining of aluminum alloy is becoming more common. It is because of the broad use of aluminum alloy parts.

When the manufacturing process is complete, the maker needs to deal with the item’s finish. It is possible to handle the surface of industrial components and parts in various ways.

Component makers select various surface treatment methods. These methods are anodizing based on their technical capabilities and practical needs.

We use Anodizing in the aluminum sector. The best manufacturer for such types is QBH Technology.

It is because of its long durability, high corrosion resistance, and improved aesthetics. You must be knowledgeable with:

· Anodizing

· The most prevalent anodized aluminum hues

· The process of anodizing aluminum objects to color them.

Anodized Aluminum!

We treat Aluminum to get a long-lasting finish as anodized aluminum. Electrochemical processes manufacture anodized aluminum by immersing aluminum in tanks.

The tanks are where the anodic coating is grown from the metal itself. If you want your designs in a matter of hours. You need to use the services of QBH Technology’s high-quality production options.

In contrast to other anodized aluminum materials, this anodized aluminum never flakes.

It is more durable than any other similar material on the market. Anodized aluminum is 3X stronger and 60% lighter than the raw material compared to others.

What Makes Coil Anodized Aluminum So Different?

A regulated coil anodizing process ensures that anodized aluminum is of:

The highest quality has the Lowest Possible Processing Costs: It drags unwound coils of raw aluminum through a succession of tanks.

The tank is where we clean them, anodize, color, seal, and rewound. We’re left with anodized coil aluminum of high quality.

Color-matched to our client’s specifications: We roll the anodized metal, ready to get to its final destination. Coil anodized aluminum reduces the number of processes. The processes may vary.

Typical batch anodizing process Reducing costs: The degree of consistency in the finished product’s appearance.

We need to establish an electrical contact point in the batch anodized process. We need it for the electrical current to aid in the development of the anodic layer. We can connect each component anodized with a metal hook or rack.

These racks often leave burn markings on the material, also known as rack marks. We need to cut off these marks, adding more waste and cost to the production process.

We expose every inch of the coil to the same length of time throughout each stage of the production process. It ensures a consistent color.

We then dip the aluminum into the tank during processing instead of coil anodizing. This process results in the metal spending more time in each part of the process. It also causes uneven color and thickness of the anodized coating.

We need to attach each metal that goes into the tanks to the racks and attaching them helps in handling damage that increases costs.

There are many benefits of using this method. You may get reduced handling and cost-saving. You will reap these benefits if you use a continuous coil anodizing process.

What Are the Advantages of Anodizing Aluminum?

▬ Durability

While aluminum is already a strong metal, anodizing it increases its tensile strength. As we know, it is 3X more durable than normal aluminum. Anodized aluminum is color-resistant and won’t peel even when treated to add color.

It is one of the most durable and adaptable metals on the market.

▬ Appearance

Decorative anodized metal lends a touch of elegance to any object. It’s possible to anodize metal. We can use a method that leaves a matte or brilliant appearance if left natural.

▬ Options for Custom Colors

It is possible to match almost any brand colors. It is because of the open structure of the anodic layers before sealing.

The material’s adaptability means that we can create it to mimic the appearance of others. It may be complete without the danger of deteriorating.

Lorin has several worn appearance finish choices if you prefer that aesthetic.

The color can’t fade, peel, chip, or flake off an anodized aluminum surface due to the nature of the material. We may count on Lorin’s UV-stable colors to stay as long as you use them.

▬ Lightweight

Anodized aluminum is lighter than stainless steel, copper, or brass. It weighs around 60% less. It reduces the cost of transporting the material. We may use it to address a wide range of design challenges.

▬ Cost

To ship aluminum anodized to a project site or industrial plant. Due to its high strength-to-weight ratio, it has a cheaper cost per square foot. It is cheaper than steel, zinc, bronze, brass, and copper.

Yet, the visual impact is the same. Aluminum has a lower environmental impact than most other materials. It is because it is abundant and renewable and the only metal that is 100 percent recyclable.

The friendly anodizing process further reduces aluminum’s environmental impact. These aspects combine to create a more versatile and long-lasting product.

Basic Anodizing Knowledge!

The anodizing process is like other surface treatment processes. We may use it to treat the surface of metal objects. Various parts machining businesses acknowledge the anodizing technique. It is because it enhances the aesthetics and corrosion resistance of the components.

This electrochemical cell reaction occurs when we expose aluminum to an acidic electrolyte. The electrolyte should serve as the cell’s anode and cathode.

Anodizing is a popular electrochemical procedure in the aluminum processing industry. It is because it enhances the surface qualities of aluminum processed goods.

Aluminum

Various Methods of Anodizing!

We can do anodizing can in various ways. There are three main categories:

· Hard anodizing

· Soft anodizing

· Combination of both.


There are three types of anodizing procedures, and each process has distinct characteristics. The characteristics are various coating strengths, different electrodes, electrolytes, and energy requirements.

Type 1: Anodizing Process

We know it as “light anodizing” and types 1 anodizing. Light anodizing gets its name because we use butyric acid as the electrolyte in Type 1 anodizing. We use aluminum as the anode.

The + ions on the anode expel, creating microscopic grooves on the metal surface. These groves will come as the current flows through the electrolyte. Compared to normal aluminum, Type 1 aluminum is more resistant to heat and corrosion.

Type 2: Anodizing Process

The electrolyte feedstock changes from butyric acid to sulfuric acid in this process. Type 2 anodizing produces a thicker oxide layer. It is because sulfuric acid is stronger at ejecting + ions. It creates deeper grooves in the metal surface.

Type 3: Anodizing Process

The type III anodizing technique is often used to produce aluminum metal goods. Type III anodizing differs from the previous two. Type 3 utilizes both voltage and a strong acid on the electrolyte. Type II anodizing uses sulfuric acid as a strong acid.

Steps to Color Anodized Aluminum!

It isn’t easy to impart color to metal objects through anodizing. There are many variables in the anodizing process.

It places more demands on the skill set of the anodized than typical painting or powder coating does.

Step 1: Aluminum Parts Cleaning and Etching

Anodizing aluminum items is a complex process that involves a lot of time and effort. The anodizing process begins with the operator cleaning aluminum components. The components are soap, cleaning and ventilating them, and drying them before etching.

We cannot stress enough how crucial this step is. Etching is also crucial in coloring aluminum goods. It is because it removes trace metals from the surface.

Step 2: Create a Layer of Oxide

We can anodize the aluminum pieces once we etch and clean them. We may color aluminum goods using three methods to meet specific client requirements.

Aluminum

Step 3: Including a Vibrant Shade

Electrolytic Coloration: The most frequent coloring method for aluminum components is electrolytic Coloring Using a solution containing metal salts, soak aluminum items.

The salt solution creates a resistant coating to UV radiation. It can do so when used to plug microspores on metal surfaces. It is important to remember that the process of coloring has constraints on bronze and black.

Pigment Coloring: The aluminum component of it must be further processed. We must put it in a dye-containing container. All the microspores on metal get filled with dye.

After that, we boil them in the following deionized water. The boiling continues until the aluminum product is completely colored.

General Coloring: The palette used here is rather straightforward. Anodizing and coloring the metal together with dyeing it black or bronze is the goal of this process. Aluminum items might be more resistant to wear. It is because of the coloring process’s benefits.

Sand Blast: Repairing flaws and polishing the surface are important steps in finishing.

Step 4: Sealing

When needed to hold dye molecules in place in the anodizing process. The sealing prevents undesired molecules from entering the gaps. We need to keep sealing temperature at 180-200 degrees F in hot water, or roughly 93 degrees Celsius.

We see improvements in the oxide film’s anti-pollution, corrosion resistance, and resistance qualities. It is because the pores in the porous oxide film generated after iodization.

Colorless and translucent, the oxide film is what you’d expect from an oxide layer.

Final Thoughts

Electrolytic anodizing is a crucial procedure in surface finishing, utilized to enhance the finished product’s optical relativity, aesthetics, etc. The anodizing process and its advantages are covered in this article. 

It also discussed the numerous variables that go into the art of color matching. The anodizing procedure is no doubt complicated. QBH Technology, on the other hand, is your best bet for high-quality products at reasonable prices.

分类
Blog

How to Use Laser Cutting To Bring Your Product Idea To Life?

You know that millions of people are doing different businesses throughout the world. Their business depends on their interest and financial needs.For this purpose, using the laser sheet metal cutting machine is becoming trendier. Laser cutters are not just crafting tools, but you can also prototype product designs. Using a laser cutter, you must follow the following instructions to bring your product idea to life.

1- Choose an Appropriate Laser Cutter

Choosing the right laser cutter to bring your product idea to life is compulsory. It would be helpful to choose an appropriate laser cutter. Choosing the right laser cutter may look very simple and easy, but it is a very complex process in reality. Purchasing the wrong laser may not provide you with your desired high-quality products. A variety of laser cutters are available in the market, and you must have accurate information and knowledge about the laser cutter you will purchase. You must know accurate information about the size of the laser cutting machines as it comes in various sizes. Looking at the reviews and consulting with buyers about different laser cutters may also prove helpful in purchasing the right laser cutter. It would be good to go for the laser cutter with the best customer reviews.

2- By Practicing with Your Laser Cutter

Before creating a product, you must have accurate information on using a laser cutter. If you have no idea of the appropriate use of a laser cutter, then you can never bring your product idea to life. For this purpose, you must do the practice using a laser cutter. The training programs may also help you in using the laser cutter properly. Using scrap material before starting the crafting of the physical prototype can be helpful and reduce the waste of assets.

3- Gain Correct Information about the Laser Cutting Machine Settings

laser cutting

Gaining the right information about the laser cutter setting is compulsory to bring your product idea to life. If you are not familiar with the proper laser cutting setting, you can’t get your desired product. Most software is provided with the laser cutting machine. By using this software, you can change the setting of the machine. Doing the right setting helps inappropriately cut and alter the materials according to your choice without any damage.

But, if you neglect the software setting, you cannot get your desired product resulting in damaging the material. You can also change the machine power using the laser cutter machine software. So you have to set proper power by clicking the software button to give the exact cuts of the material. Moreover, it would be good if you also had a good idea of the speed setting of the software program of the sheet metal laser cutting machine.

4- Take Precautionary Measures

Safety should be a priority no matter what machine you are using. The same is the case with laser cutting machines. The improper use of the laser cutting machine or any other machine such as cnc machining can lead to severe damage. If you neglect proper precautions while using laser cutters, you may face eye burn or other serious eye problems. So, to prevent severe damage, you must use eye protection.

Moreover, it would help keep a distance from the laser machine while using machining can be helpful to prevent damage. You must properly clean the machine to prevent any damage from a fire at the end of the laser machining process.

After completing the machining process, the proper shutting down of the machine is also compulsory for protection from any damage. So, by following these precautionary measures, you can prevent danger, thus bringing your product idea to life.

5- By Creating a Digital Prototype

laser cutting

While manufacturing a product, you must keep manufacturing the product at a much lower cost. A manufactured product with a high cost only provides you with a loss instead of profit. So while manufacturing products using a laser cutter, you must avoid manufacturing direct physical prototypes. Before manufacturing physical prototypes, you must design digital prototypes.

The main reason for this is that it may result in a material loss when you directly design a physical prototype. Due to the loss of material, you may face the high cost of the manufacturing process. Thus to avoid high costs, you must design the digital prototypes first.

You can highlight any mistakes and flaws by designing digital prototypes and can improve these mistakes. Different soft wares can help you in creating digital prototypes. Thus creating digital prototypes can help you in saving both money and time.

6- By Creating a Physical Prototype

After creating a digital prototype and learning the mistakes and skills of using a laser cutter, you have to create a final physical prototype. Creating a physical prototype with proper laser cutting skills saves time and reduces costs. Such physical prototypes bring your product idea to life.

7- Refining and Redesigning

laser cutting

You can also learn a lot of mistakes while creating physical prototypes by using laser cutters. Making mistakes is a common problem, and you can overcome this problem by refining and redesigning the products. After refining and redesigning using laser cutters, you can bring your product idea to life.

Conclusion

Using laser cutting machines is no doubt a difficult task. A little negligence in using the laser cutter can lead to severe damage and ultimately damage your desired product. It would help if you use the laser cutter with proper precautionary measures and have detailed information about the setting of the laser cutting machine.

The improper information about the setting of the laser cutter can permanently damage your product. Moreover, you must also avoid creating direct physical prototypes because you may create undesired cuts. So, initially, you must create digital prototypes.

Physical prototypes can show you your flaws and mistakes and have an important place in the manufacturing process, so it’s natural to make mistakes to create something new. Practice makes you perfect, so you can use laser cutting or metal fabrication to bring your product idea to life by keeping in mind all the instructions mentioned above.

分类
Blog

WHAT IS SHEET METAL FABRICATION?

Sheet metal fabrication is the process of shaping metals and molding them to make the best out of them. These useful things might range from daily use cutlery in the kitchen to heavy-duty machines in some industrial units. The excessive use of metals in our daily life is not a secret. Metals are a vital part of modern human life that has evolved with time and technology. Motor vehicles, airplanes, ships, medical instruments, home appliances, and many more are made after fabrication of the metal sheets, partly or wholly.

Metal fabrication is a process that includes manifold procedures. We can employ various steps to make a fantastic final product that will benefit man by all means. The combination of these processes may vary according to the needs of the specific products.

How Sheet Metal is Beneficial?

We can buy metals in a specific shape and form which is called sheet metal. Any metal that has a thickness of between 0.5-6 millimeters is sheet metal. There are various advantages of sheet metal in the relevant industry.

  • Sheet metal design options are very flexible and affordable. It can provide high quality for production or prototyping. Hence, the clients can express the need for specific functionality.
  • Single prototypes to volume production, everything is possible with sheet metal. It is highly suitable for contemporary production methods like 3D printing. It provides quick lead times which are well-aligned with the needs in prototyping.
  • Sheet metal fabrication processes are suitable for a gradual transition from prototyping to large-scale production. It enables the small start from making prototype sets to go for larger quantities by establishing the required infrastructure.

sheet metal

Some Techniques of Metal Fabrication

Laser Cutting Technique

Laser cutting is a process that uses a high-powered laser beam on a sheet material to heat and mold the material. Laser technology is the most widely used instrument for cutting metal sheets in the fabrication process. It provides highly clean touches to help in making a wonderful final product. A gas laser typically uses oxygen or nitrogen to gain high temperatures right before the laser exits the nozzle.

Plasma Cutting Technique

The plasma cutter works perfectly on electrically conductive materials. It creates an electrically charged beam of compressed ionized gas, known as the plasma. The material heats tremendously and melts away. The compressed gas blows away the excess material through its pressure. Although the result is a rough cut with a large burr and oxidized zone around the cut, this process suits rapid production.

The Technique of Water Jet Cutting

Water jet cutting uses high pressure and high-velocity streams of water along with other abrasives to cut the sheet metal. Around 2000ft/s (610m/s) velocity of the water stream with a pressure of around 60,000 psi (415 MPa) works quite smoothly.

Water jet cutting could have replaced laser cutting, but it is much slower. Moreover, laser cutting is ahead in terms of using its depth control functionality where water jet cutting cannot operate. Water jet also has a larger kerf width of 0.02-0.04” (0.5-1mm) which is larger than that of a laser.

Shearing the Sheet Metal

Shearing is the process of cutting a straight line through the material. It separates the metal sheet into two distinctive pieces. It is similar to the straight edge paper cutting machine in most offices.

This mechanism uses hand power, hydraulics, or electricity depending on the thickness of material and length of the cut needed. We place sheet metal on a die and support arms. The upper blade exerts a large shearing force on the material that results in cutting the sheet.

Blanking & Punching

Blanking and punching are the same processes with opposing results. Blanking is the process in which a die holds the sheet metal, and a punch places a blanking force through the material.

Punching is the exact opposite. The punched material is scrap, and the material still on the die is the resulting component.

Sawing Through the Metals

There are many types of sawing operations in vouge that can be employed to cut large pieces of tube or sheet. Whether a band saw or a disc saw blade, that works by progressively cutting through the material. Each sawtooth on the saw separates a small chip of material away through friction and shear forces.

Sheet Metal

Processes of Sheet Metal Forming

Bending

A piece of sheet metal is placed on a die in this process with a specific geometry. The punch presses into the material to form the sheet metal to the die. Seemingly easy bending can be tricky practically. We can understand the ordeal by an instance of using a 45° V-die, the material does not reach inside the V due to the thickness.

Hemming

Hemming provides straightedge without burrs. Hence, it can prove very useful when shearing processes are not available. Hemming is bending of the sheet metal upon itself. This is a two-stage process. Firstly, a piece of sheet metal is bent into a V-die. Secondly, it is removed and placed into a flattening die to flatten the hem. Hemming and curling are different techniques because of the exposed raw edge.

Curling

Curling creates a nice rounded edge by covering the rough edge inside the curl. We employ three steps generally in curling and can also use it for hinging applications. A piece of sheet metal is pressed into a circular die in two locations and, then, closed together with a circular punch.

Rolling

Two or more hydraulic press rollers are used to fabricate the metal sheet. We can shape the material into versatile figures by changing the geometrics and distances of the rollers.

Roll Forming

Roll forming uses long sheets and enhanced rolling of the different spectrums to form intricate sheets. This process is utilized to mold different types of tubing, channeling, or complex shaping.

Metal Spinning

It consists of a disk or cylinder of sheet metal, placed on a mandrel, on a lathe, and a roller tool shapes the sheet to the mandrel shape. Metal spinning is either conventional or shear spinning.

Deep Drawing

Deep drawing machinery works similar to shear punch but, there is more gap between punch and die. A die holds the material and the punch draws into the sheet metal to stretch and form the material.

sheet metal

Sheet Metal Materials and Applications

Cold-Rolled Steel

It is comparatively cheap and rolled at room temperature. Cold rolled steel is only limited to 3 mm thickness but comes with a nicer surface. So it fits in applications that require nice smooth finishes including home appliances, furniture, lockers, and cabinets. Cold rolled steel is also used in larger structures, e.g. steel sheds and garages.

Hot Rolled Steel

It is formed in a heated state as the name suggests. Hot rolled steel is also found as thicker sheets. Hot rolling allows easier forming making it cost-efficient.

Hot rolled steel does not have accurate dimensions. After rolling, the metal cools down and shrinks. This causes concentrations of stresses that can warp the material or change the measurements.

Stainless Steel

These sheets are good in corrosive environments where strength is also important. It is used for all kinds of surgical instruments, cutlery, kitchen accessories, sinks, etc. Some of the industrial uses are for storage tanks, valves, and piping, etc.

Aluminum Sheets

As it comes with a heavy price tag, yet not used commonly by people. Still, aluminum finds a lot of scope in the market because of its salient qualities. It is corrosion-resistant, strong, and lightweight. These qualities make it special for the transportation industry where extra weight causes long-term losses. Many advanced consumer gadgets like phones and laptops have a durable aluminum casing that is also light in weight.

Copper Sheets

Copper sheets are available in different variants to fulfill versatile demands. Copper brass, copper, beryllium copper are widely used among them. The salient features of the copper make it a favorite for many.

  • High electrical conductivity
  • Easily recycled and reused
  • High resistance to corrosion
  • Flexibility
  • Impedes growth of bacteria

Copper can cost you fairly high even though it’s not as strong as aluminum or steel. Handling it can be difficult during machining or welding. It responds well to bending by creating beautiful results. It does not catch rust, but it can age into a unique finish. Copper is frequently used for pots and pans, fixtures, and electronic equipment.

Commercial copper sheet metal has high purity ratings. Both of the variants it is supplied in, consist of more than 99% copper. Impurities like oxygen, lead, or silver may fill the remaining tiny share. It is highly bendable, formable, and electrically conductive. Hence, making the use of copper for sheet metal applications is easier than other less ductile materials.

Brass Sheets

Brass is a combination of copper and zinc. Due to its strong acoustic properties, it’s the main metal in many instruments. Moreover, it is also found in items of daily life like doorknobs, nuts, bolts, and pipes.

分类
Blog

Complete Guide on Polishing Surface Finish for Custom Metal Parts

Introduction

Custom metal parts need polishing not just for improving their aesthetic appeal but also to facilitate improved functioning and long life. Therefore, it wouldn’t be wrong to say polishing is an interesting combination of art and science. And it is extremely important too! Custom metal surfaces tend to accumulate grime, dirt, and rust, significantly reducing their build quality. This mostly occurs when the custom metal part comes in contact with air. Not just that, high temperature and extensive use can also compromise the metal surface. So, how can you ensure an adequate polishing process? Let’s find out!

Why should you go for a polishing surface finish?

A polishing surface finish provides a reliable protective layer of reflective surface that prevents any kind of contamination or oxidation. The reflective surface also functions effectively to deter any corrosion happening on the surface. The best thing about polishing surface finish is that it can be used over a wide range of metals, especially used in manufacturing processes.

What does a polishing surface finish involve? The process requires the use of abrasive materials over a metal surface. The idea is to remove scratches and nicks from a surface. These scratches are often the result of bumping into other machine parts in the manufacturing process. The abrasive material helps improve the surface’s shine and luster. Later, you will get a mirror-bright finish when you buff the polished surface.

Indeed, the use of abrasives and other compounds over the material might render it useless for high purity applications. But, there are several reasons why you should go for a polished surface finish.

  • It significantly improves the cleanability of the custom metal part.
  • Removes roughness from the metal surface and makes it smooth.
  • Effectively increases the metal’s ability to fight corrosion.
  • You get an improved aesthetic appeal without compromising the part’s adhesive properties.

At the same time, you should know that the entire process is quite labor-intensive. Not just that, the abrasives and rubbing compound might stay embedded in the metal. That’s the reason why we recommend hiring professional polishing surface finish services to get the job done.

What are the applications of polishing surface finish?

The most talked-about benefit of polishing surface finish is the high level of smoothness it brings to the surface. In other words, you will not find dirt, grime, or microbes on the surface. The level of cleaning polishing surface finish archives eventually keeps the surface sterile and clean.

Polishing surface finish often finds its application in the medical, aerospace, and electrical industries. It is used in medical equipment manufacturing, reflectors, mirrors, solar energy concentrators, safety mirrors, fire truck bumpers, springs, wire cracks, fasteners for marine applications, and more.

How do you measure surface finish?

But, how do you differentiate between a low-level surface finish and a high-level surface finish? It is crucial to measure and specify the standard of surface finish you apply to a custom metal part. But, there’s a lot of misinformation and confusion making rounds across industries when it comes to determining the stand of surface finish.

To achieve a consistent surface finish on a custom metal part, you will have to factor in variables like grit size, tool load, tool condition, feed rate, traverse rate, condition or metal, and lubricant. Here are some standard values that you can use for reference to determine the surface finish quality on a metal part.

Standard Grit

Ra µinRa µmRMS µinRMS µm
            150  27 – 32  0.68 – 0.80    30 – 35  0.76 – 0.89
            180 16 – 23  0.46 – 0.58    20 – 25   0.51 – 0.64
            240 14 – 18  0.34 – 0.46    15 – 20   0.38 – 0.51
3208 – 100.21 – 0.259 – 11

0.23 – 0.28

In the above table,

  • Standard Grit shows the number of scratches per linear inch of abrasive pad. Surfaces with higher grit are smoother.
  • RMS here is defined as Root Mean Square roughness. You can measure the peaks and valleys throughout the surface polishing process. A lower RMS value indicates a smoother surface.
  • Ra is defined as the arithmetic mean or average of the peaks and valleys of the surface polishing process. In this, a lower Ra value indicates a smooth finish.

surface finish

Pros and Cons of different polishing surface finish 

You can use different methods to impart polishing surface finish to custom metal parts. In this section, we will discuss them and mention their pros and cons. It will help you figure out the type of polishing surface finish you should add to your manufacturing process.

  • Mechanical polishing

Mechanical polishing functions by cutting into the surface of the material. It removes the polished convexities and helps obtain a smooth surface finish. You will use materials like sandpaper, flat wheel, abrasive stick, and more to put mechanical polishing into action. Although mechanical polishing is suitable for manual operations, you can use auxiliary tools to improve your precision to achieve a high-quality finish.

Mechanical Polishing
ProsCons
  • Produces high brightness and shine
  • Achieves improved surface finish
  • The custom metal part gets better surface cleanability
  • Ensures the metal’s aesthetic appeal
  • Significantly reduces surface adhesion
  • High labor intensity required
  • Cannot be used to treat complicated custom metal parts
  • Achieves irregular shine which also might stay for long
  • Custom metal parts might still be vulnerable to corrosion
  • Chemical polishing

Chemical polishing surface finish, as the name suggests, involves treating the custom metal surface in a chemical solution. In this, the chemical solution, under the influence of galvanic couples, produces layers of polish on the custom metal parts. The passive layer provides a smooth surface to the metal parts. Here are the pros and cons of the process.

Chemical Polishing
ProsCons
  • One of the best methods to polish custom metal parts that have complex shapes
  • You can apply the method to several parts at the same time
  • Requires less equipment, hence cost-effective
  • Generates high efficiency
  • Ensures solid corrosion resistance
  • Might lead to irregular polishing and shine
  • Makes it difficult to heat the custom metal part
  • Produces byproducts that are mostly harmful
  • The polishing chemical solutions cannot be used over and over again
  • Electrolytic polishing

Electrolytic polishing, also known as electrochemical polishing or anodic polishing, has a similar principle to chemical polishing. However, the cathodic reaction isn’t involved in electrolytic polishing, making it different from chemical polishing. Moreover, you achieve a better polishing surface finish through electrolytic polishing. Here are a few pros and cons you might want to know.

Electrolytic Polishing
ProsCons
  • Shine and luster lasts long
  • Ensures consistency in internal and external color
  • Helps get an extensive range of finish
  • Cost-effective and quick
  • Ensures minimal pollution
  • Provides high corrosion resistance
  • High upfront investment required
  • Needs a pre-polishing process which is quite complicated
  • Requires auxiliary tooling and electrodes to polish complex custom metal parts

Complete polishing surface finish process for custom metal parts

Now that you are entirely acquainted with polishing surface finish, it’s time we help you learn how it works. Polishing surface finish is a four-step process. Let’s discuss them in detail, shall we?

  • Roughing

Most metal parts undergo machining to make them usable in the manufacturing process. Machining also involves welding and joining, which often leaves scratch marks and defects on the metal component’s surface. How will you remove them? Just roughen the surface up! Eliminate these defects by selectively roughing up the surface. You can use a roto-orbital sander or other grinding machines with suitable abrasives. If you have to grind a large area, go for abrasive disks with a larger diameter and 1200 or 1500 grain. Use small diameter abrasives to roughen up smaller surfaces.

  • Polishing

The second step in the process is polishing. Once roughened up, a quick-cut abrasive paste, often a water-based slurry, is applied on the surface with the help of wool berets and polishing sponges or pads. The abrasive paste is well spread, and the surface is later cleaned with the help of a microfibre cloth. Several polishing pads are available in the market. You can use foam polishing pads, microfiber pads, or even wool.

Foam polishing pads are quite common as they are more versatile and easy to use. You might want to check the pad’s porosity before buying them as it can affect its performance. Microfiber pads are more aggressive than foam pads. Make sure you don’t put much pressure on the pad as it won’t absorb enough material. Wool is coarser and imparts a much higher cutting action. However, it is not easy to maintain and isn’t cost-effective, unlike foam polishing pads.

Don’t confuse polishing with lapping. Although they are quite similar in most aspects, polishing systems use a pad and slurry. The surface tension is higher than it is in lapping, both during and after the polishing. Lapping produces a dull, non-reflective surface which we know as matte. It will have a multi-directional lay pattern and a coating effect on the custom metal part. On the other hand, polishing will produce a reflective finish and is usually the second in any polishing surface finish process. It perfectly seals the cuts on the surface with the polishing material.

  • Brightening

The third step in the polishing surface finish is brightening. In this, we try to achieve polish uniformity across the metal surface. You cannot focus on producing a uniform finish during polishing because you are concentrating entirely on putting polish all over the custom metal part. Hence, you need brightening to spread the polish evenly and recover the component’s initial appearance. 

  • Protecting

We all know what we want from the process – a bright, polished, durable, and stronger custom metal part. That’s the ultimate aim. Before we conclude the process, we will have to ensure that the finish on custom metal parts is well protected. Most manufacturers will apply a protective wax coat to make the polished surface more durable in the manufacturing process.

surface finish

Seven Best Tips for Polishing Surface Finish 

Achieve polishing surface finish for any custom metal parts using these top tips by industry experts. Let’s check them out before we conclude the guide.

  • Wear appropriate safety gear before polishing. The polishing surface finish process involves materials and equipment that may cause injuries.
  • Always use abrasive discs with polyester films as it helps ensure the correct roughness and achieve more uniformity.
  • A unidirectional approach to polishing will not help produce a uniform finish. Vary the directions, especially if you are polishing materials with irregular shapes.
  • Don’t add too much polishing compound as it will form grease over the surface.
  • Make sure the abrasive material isn’t too hard or too watery. Prepare a perfect abrasive slurry before polishing.
  • Polishers should be used at about 900 rpm.
  • If you happen to get grease marks on the surface, wipe it off using a dry soft microfiber cloth.

Keep reading!

There you have it. We have shared a comprehensive guide on polishing surface finish for custom metal parts. This post aimed at introducing you to polishing surface finish, its applications, different types, and the process. We hope you now have a firm understanding of the process and what to expect in the process. Did you find this post helpful? Let us know in the comments. If you enjoyed reading this post, don’t forget to check out other informative posts on the blog!

Get an instant quote from our most experienced consultants

Open chat
Hello
Can we help you?