分类
Blog

What is Deburring and What Type of Deburring Tools Should You Use?

Deburring is the process of using manual or automatic tools to remove burrs from freshly machined parts.  But to fully understand deburring, must first discuss burrs and how they are formed. As with all manufacturing problems, this is a complex topic with several solutions.

In this article, we break down the basics of burrs and all the effective ways of deburring.

What Does Burr Mean?

Metalworking is not a perfect process and will often result in slight bumps on the cutting surface that get pushed to the edges. These tiny metal bits are called burrs. Burrs are an undesirable side effect of metal working. They can range from slight surface imperfections that ruin the look of your part to material defects that can affect part performance.

It should be noted that burrs can also form on plastic edges. Though it is less common and less harmful to the integrity of the part.

Sources for Burr

Burrs can occur during a number of cutting and machining operations. We can break down burr sources into three categories.

1.Stamping

2.Casting

3.Machining

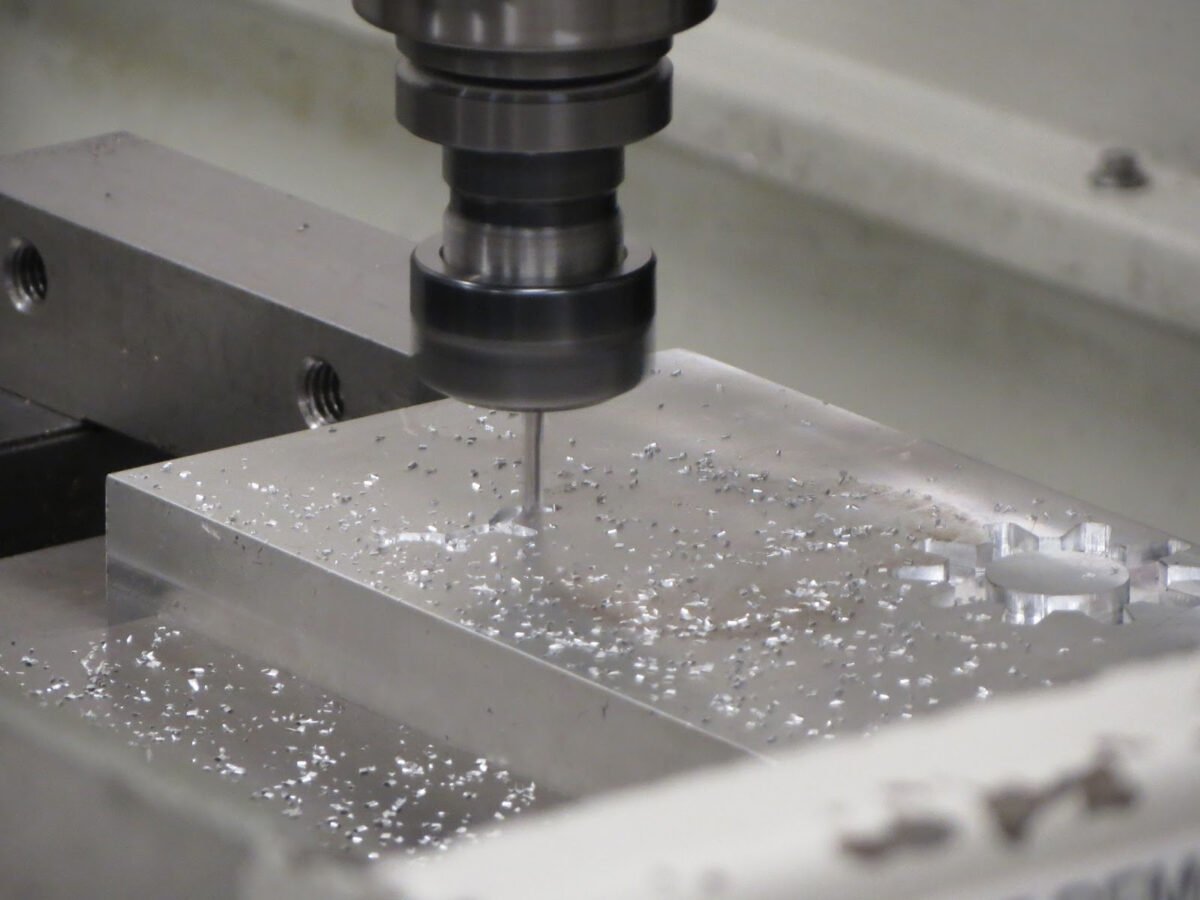
Machining in particular has several sub-sections that contribute to increased burr production. Poorly maintained tools, fast cutting speeds, and workpiece material will lead to more burrs during the machining process.

8 Popular Methods of Deburring

Deburring is a very broad term that can encompass various tools and techniques. As a general rule, deburring refers to processes that grind, cut, or shape materials to remove burrs and create a smooth surface finish. 

The following is a list of the most common deburring practices. 

1 – Deburring using Manual Tools

The easiest and simplest method of deburring is cutting off the burrs using hand tools. Commonly you will see a handle-based tool, similar to a screwdriver. However, this tool comes with an oddly shaped head that is designed to remove burrs.

Manual deburring tools are just as effective at removing burrs as their machine-operated counterparts. But they also come with a few caveats. 

1.It requires a high level of skill. Slight mistakes and misalignments can result in scratches and dents in the part.

2.It is a time-consuming process that can be very exhausting. For large factories that deal with high volume production manual deburring is a major bottleneck.

3.It is quite easy to forget to deburr some sections of a complex part.

Despite its shortcomings, manual tool deburring can still provide a quick and convenient means to remove prominent surface burrs. You can also use sandpaper and metal files to remove burrs, though they will have limited functionality. 

2 – Deburring using Grinding

Grinding is the best mechanical means of removing burrs. Sure, specialized tools and deburring machines can help remove burrs more effectively and quickly. But they also cost a lot more and require precious floor space. 

For most basic designs, you can easily deburr the edges on a grinding machine. You can also trim down the dimensions and smooth out the corners during this process. Flat metal parts in particular are well suited to deburring via grinding.

3 – Roller Deburring Tools

Roller deburring tools are a two-part set that deburrs sheet metal by crimping the edges. The fabricated metal sheet is placed on the machine bed, with one part of the roller underneath it and the other above.

The roller tool follows a fixed path around the perimeter of the cut surface and presses the edge between the two halves. Unlike grinding, roller tools don’t carry the risk of shaving down the part edges. 

Roller tools are best suited to internal cuts, holes, and cavities of a sheet metal part. They quickly remove burrs while maintaining part tolerances.

4 – Hole Deburring Tools

Hole deburring is a difficult process, so much so that there is a whole industry focused on more convenient hole deburring tools. For small holes, you need specialized tools that can trim off the burrs without affecting the hole diameter.

Hole deburring tools can be sub-categorized into the following.

1.Manual deburring tools.

2.Semi-automatic bits that can attach to a screwdriver or a rotary tool.

3.Deburring tools for CNC machines.

5 – Deburring using Brushes

Brushing is a simple technique where you scrub the edges of the machined part with specialized brushes. You can perform this process manually using a wire brush. But for cleaning delicate parts and better surface finish you can attach deburring brushes to a CNC machine.

Machining-compatible deburring brushes (also called disk brushes) come in metal and non-metal varieties. The brushes come in various shapes and sizes that can remove burrs from internal cavities as well.

Generally, you will find deburring brushes with polyamide fibers that are coated in an abrasive material. However, some brushes are closer in design to a grinding disk than a brush. Here are some popular examples of deburring brush materials. 

Silicone Carbide

Aluminum Oxide

Ceramics

Cubic Boron Nitride (CBN)

Diamond 

6 – Micro Bead Blasting

Sandblasting is a post-processing step in machining, where the final part is sprayed with high-velocity sand particles to smooth out the surface. Micro bead blasting uses the same process to shoot small glass, plastic, and sodium bicarbonate beads to deburr edges.

Microbead blasting is a generally quick way to deburr several small parts. 

This process is generally compatible with most metals and non-metals and is only limited by the type of beads. Microbead blasting is also a convenient way to combine deburring and post-process finishing into one step.

7 – Electrochemical Deburring

Electrochemical deburring uses electrolysis to remove burrs from very small parts or parts made from a tough material. Here the part is submerged in an electrolyte (usually a salt solution) and a deburring bit is used as an electrode. As the current flows through the electrode into the electrolyte it removes the burrs with it,

This is a high-precision process typically reserved for special applications. You would commonly see this deployed in small parts with hard-to-reach areas. Microelectronics and high-end jewelry might be the best application for this method of deburring.

8 – Thermal Deburring

Thermal deburring involves placing several machined parts into a sealed combustion chamber. Here oxygen and fuel are ignited for a few milliseconds reaching temperatures upwards of 4500°F (~2500°C).

The designed part with its considerably larger mass easily dissipates the excess heat. In comparison, the smaller burrs are unable to withstand the extreme temperatures and are completely oxidized.

The combustion leaves no scratches or machining marks. But it will leave a thin film of fuel residue on the part service. A quick wash or polish will easily clean up the parts.

Thermal deburring is limited to aluminum, carbon steel, stainless steel, and zinc.

3 Important Benefits of Deburring

Deburring is generally beneficial to a machined part. It is hard to list all the ways deburring can help elevate your part quality. Instead, let’s focus on the three biggest benefits.

1 – Safety

Without a doubt, the biggest benefit of deburring has to be employee safety. Large burrs are sharp, tough, and difficult to manage. Handling parts with burrs can quickly lead to cuts on the hands. Large burrs can even cut through protective safety equipment, like gloves. 

By this logic, you might think that smaller burrs are less harmful. But it is the exact opposite, small burrs are even more dangerous to the part handler. Small burrs can break off and get stuck to clothing or embed themselves into the skin. In a factory space, where employees often handle hundreds of machined parts a day, accidents like this are very common.

Burr-related accidents also extend to the end user. No reputable manufacturer will ever sell you a part without deburring it. If someone doesn’t deburr their machine parts, it’s either a cost-saving measure or carelessness. 

2 – Quality

Deburring improves the overall fit and finish of the final part. Burrs should be categorized as machining flaws, as they can impact other adjacent parts in an assembly. They affect the lubrication of components, fastener seating, corrosion resistance, and more.

Deburring smoothes out the flaws, increasing the overall quality and functionality of the product. Complex designs in particular, significantly benefit from the deburring process.

3 -Tolerance

Burrs are generally very small in size. Even with careful and precise machining, you will end up with micro-burrs that can affect the overall tolerance of your machined part. Parts designed to fit into the complex assembly often only have a few millimeters of tolerance. If the parts are not deburred properly they can affect the final dimensions of the assembly.

Tips for Deburring Parts

After reading this article you already have most of the necessary information about deburring. We are confident that this knowledge will help you better manage your machine parts. However, there is always room for growth and optimization.

Here are some important tips to help manage your deburring process.

Preventing Burr Formation

Before we work on deburring practices, it is best that you minimize the burr formation in the first place. You can minimize or even completely eliminate machining burrs by taking proper precautions. 

The steps for minimizing burrs will differ from machine to machine and material to material. Look at the specification of your cutting machine and take appropriate steps. As a general rule, slower machining with a tough and sharp cutting tool will keep the burr formation to a minimum.

Use Automated Deburring Tools

Manual deburring is a quick and effective way to clean up a part, but only when dealing with small volumes. As soon as you increase your production capacity, the time and labor costs of manual deburring start to add up.
Automated deburring machines are designed to precisely remove burrs in large batches. For sheet metals, roller deburring machines in particular can save you hours of work every day. While complex designs will benefit from a CNC deburring tool. 

Invest in Rotary Deburring Brushes

Deburring brushes offer some of the highest cost-efficient post-processing. They are quick, efficient, low-cost, long-lasting, and come in several variations. You can also use deburring brushes to simultaneously cover multiple surfaces at the same time. 

You don’t have to restrict yourself to automated machine deburring with rotary brushes. You can attach these brushes to a manual rotary tool and deburr by hand.

Try Cutting Fluid

Cutting fluids help keep the workpiece cool during the machining process. But they also reduce cutting friction, prevent tool wear, and give a better surface finish. Deburring at its core is just another type of machining process and it will equally benefit from cutting fluid.

Let QBH Machines Deburr Your Designs

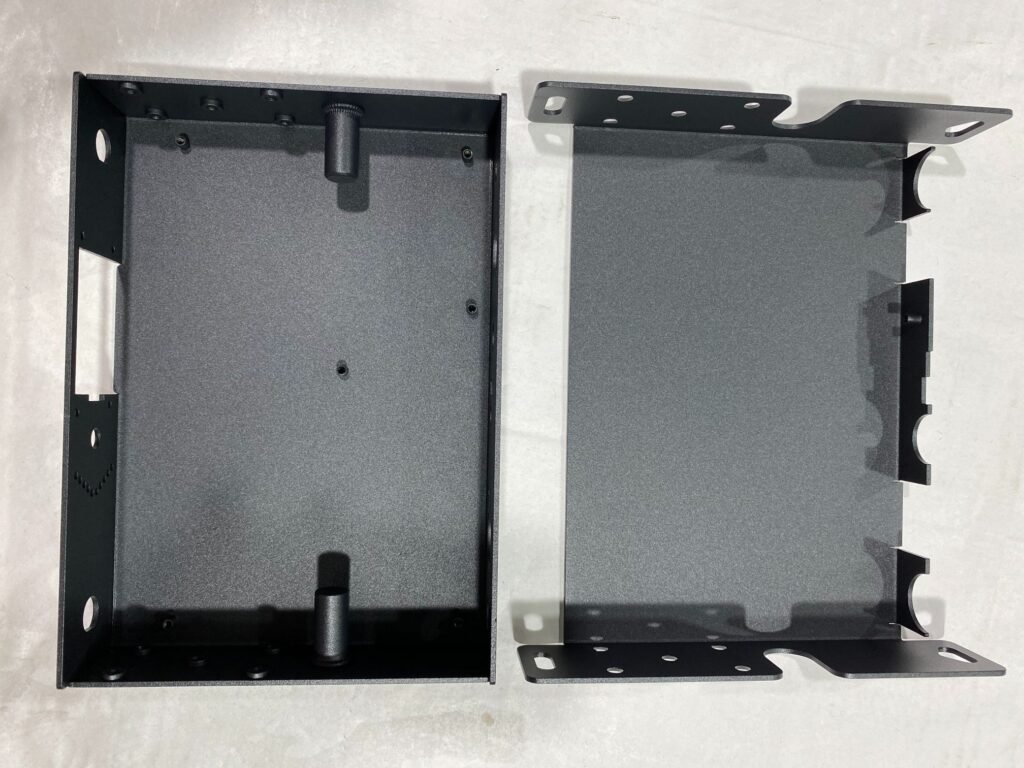
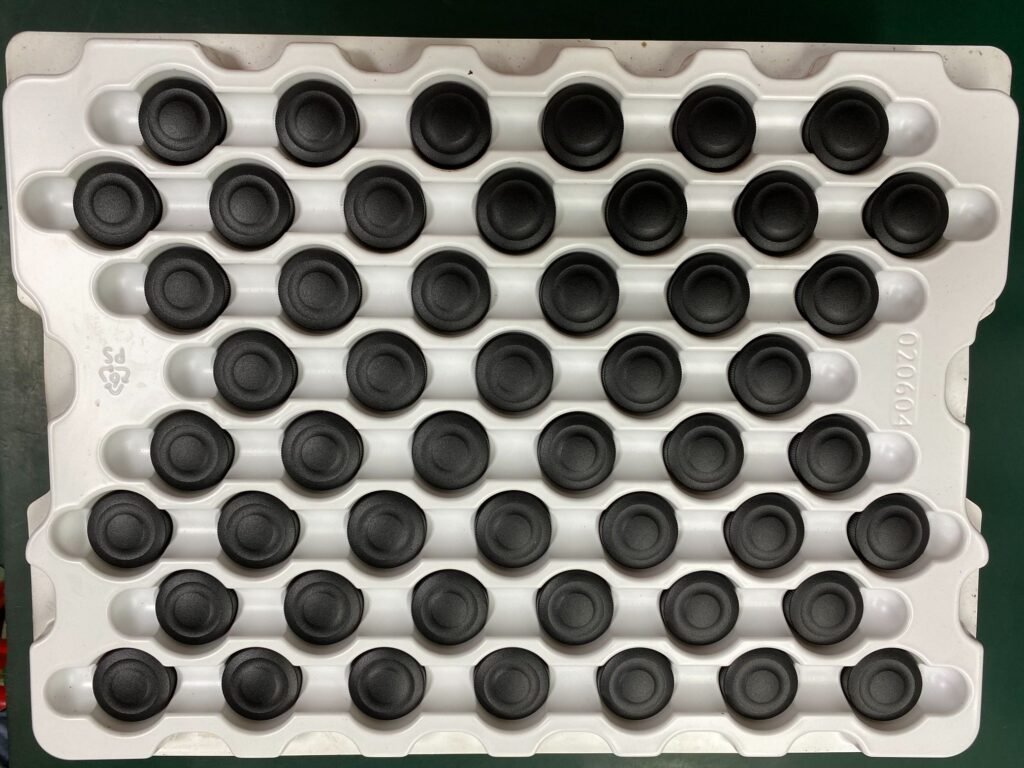
QBH is an expert when it comes to metal fabrication and CNC machining parts. We pride ourselves on our excellent quality control and in-depth product inspections. Our team of dedicated and hardworking engineers, machinists, and customer care personnel help us deliver high-quality products on time and on budget.

All our machined parts go through an essential deburring process. Experience our best-in-class service firsthand. Contact us Now!

分类
Blog

How CNC Machining Became a Pillar of Modern Manufacturing?

CNC machining has been lauded as the biggest advancement in manufacturing over the past half-century. Modern manufacturing utilizes various fabrication techniques and almost every one of them involves the use of CNC machining. So, How did CNC machining become a core pillar of modern manufacturing?

Here is a detailed analysis of the impact CNC machining has had on the manufacturing sector.

CNC Machining vs Traditional Manufacturing

Before we talk about modern manufacturing we need to define its predecessor, traditional manufacturing. Nowadays electronics and computers have become synonymous with manufacturing. But before the advancements in microprocessors, all manufacturing was done manually by hand.

Traditional Manufacturing

Instead of fancy automated machinery, people relied on hand-carved molds and simple tools. Making a simple metal knife was more of an artistic endeavor. Workers would use their eyes to match the size of the blade and hammer it into the correct shape. Though all this work is impressive and a true testament to the skill of the worker, it is also very slow.

Since everything took hours, if not days to manufacture. The manufacturing sector could not keep up with the growing population and its demands. All this resulted in increased prices for everyday products like pots and pans. Even with the invention of milling and lathe machines, this bottleneck in the industrial sector could not be resolved. 

CNC Machining

The first CNC machine was invented in the early 1950s and it only took a few years for it to become prevalent in the manufacturing sector. The first CNC machine was called a motor-controlled apparatus. But with the advancements in computer technology, the term Computer Numerical Controlled (CNC) quickly took over.

Advancements in manufacturing techniques over the past few decades have made CNC machines more efficient, safer, and cheaper. It was only a matter of time before CNC machining took its place as a core pillar of our modern manufacturing.

Impact of CNC Machining on Modern Manufacturing

It’s not difficult to see the impact CNC machining has had on modern manufacturing. Everything from increased precision to the reduction in machine times has been made possible by CNC technology. 

Here are our picks for manufacturing elements that have benefited the most from CNC machining.

Better Accuracy & Precision

CNC Machining

By far the biggest impact of CNC machining can be seen in the accuracy and precision of parts. Machining accuracy is the ability to produce parts as close to the desired dimensions as possible. In contrast, machining precision refers to the ability to maintain the same accuracy across multiple parts.

A machine that lacks precision will produce parts within derided tolerances, but all parts will have slightly different dimensions. However, if a machine is precise but not accurate it will produce parts with the same dimensions but all parts will have the wrong dimensions.

Accuracy and precision mistakes were quite common in manual machining. Limiting the use of parts to low-performance applications. As CNC machines are all controlled by a computer system, the machine can accurately and precisely cut the workpiece within 2000th of an inch (0.0005”).

Higher accuracy and precision meant that manufacturers could produce smaller and more robust parts. Without the capabilities of CNC machining, manufacturers could never produce modern electronics like smartphones.

Rapid Prototyping Capabilities

CNC machining

Prototyping is an important step in the development cycle of a product. A simple product will typically go through dozens of iterations before hitting the market. Longer fabrication times lead to a longer development cycle which slows down innovation and growth.

CNC technology has reduced machining times from days to just hours. Now you can manufacture several different prototypes in a single day. This type of quick prototyping service is called rapid prototyping.

Rapid prototyping has allowed engineers to focus on designing parts, rather than worrying about lead times. Slow prototyping was a major hindrance to engineers, as there was never enough factory space to accommodate all the designs. Manufacturers would allot production capacity to tried and true products, instead of newer designs. 

Greater Material Compatibility

CNC machining

Traditional manufacturing lacked diversity and was limited to metal working. However, modern manufacturing has opened the doors to a whole new set of materials. Metals, plastics, composites, hardwoods, and everything in between are now compatible with CNC machining.

Modern woodworking has maintained its traditional roots but has become more efficient and versatile through CNC lathes.

Meanwhile, metal machining has taken a whole new life with CNC. Harder and tougher alloys that previously were considered non-machineable are now commonplace in most factories.

The capabilities of CNC machining incentivized researchers to develop even tough materials, like titanium alloys. Materials that have allowed mankind to send rockets into space.

Lower Operating Costs

Managing and running a factory is tough work. Traditionally you would have needed to hire hundreds of employees working in three shifts to stay profitable. More employees meant higher investment, in tools, wages, and factory space. 

A single CNC machine can do the work of a hundred manual machines, in less time and with only one operator. The lower operating costs have allowed small businesses to stay competitive with large corporations, without compromising on quality. 

CNC machining has decreased the barrier of entry to the manufacturing space. You can buy a single CNC mill and start your own local machining business with the smallest amount of investment.

On the other side of the coin, lower operating costs have also allowed large factories to increase their production by a hundred folds. Modern manufacturing now produces more products per day, all while keeping material waste to a minimum.

Improved Workplace Safety

CNC Machining

The impact of CNC machines isn’t limited to the production line. One of the most significant benefits of CNC is superior workplace safety. CNC machines are designed to minimize the interaction between operators and the cutting tool. Once the material is fixed to the machine, the operator inputs the necessary commands from a distance and monitors the cutting operations. 

Safety is a core component of any industrial work. And the lives saved by the introduction of CNC machines are immeasurable.

In our appreciation for CNC machines, we often tend to forget to mention worker safety. Modern manufacturing would not exist if it weren’t for the safety features of CNC machines.

Scalable Machining Operations

CNC machines are extremely versatile tools that are only limited by one’s imagination. Another major improvement in the manufacturing sector is scalability. In short, scalability is the ability of an operation to meet the demands of low-volume production and scale up to large-volume production. 

CNC machines are some of the few manufacturing tools that are equally viable for small businesses and large factories. A standard 3-axis CNC mill is commonly used by small business owners, for producing custom parts. But the same machine is used by larger factories to produce simple design parts in bulk. 

You will often see start-ups use modern manufacturing to prototype, refine, and mass produce their designs. It also shouldn’t come as a surprise that all of this can be accomplished using a simple CNC machine.

CNC Machining Applications in Modern Manufacturing

The best way to visualize the impact and importance of CNC machining is by looking at real-life examples. To illustrate this impact, we have listed below, the most popular applications of CNC machining in modern manufacturing. 

CNC machining

Electronics

Without a doubt, the biggest advancements in the past few decades have come from the tech sector. CNC machining has been a crucial element of modern smartphone and laptop manufacturing. 

Woodworking

Woodworking has seen little in terms of innovation from the use of CNC. But it has significantly benefited from the efficiency provided by CNC machining. Complex designs and shapes that previously took weeks to hand-craft, can now be CNC machined in a matter of hours.

Beds, chairs, wall art, etc. are all currently being made using CNC machining.

Musical Instruments

Musical instruments like guitars, cellos, and pianos still require a lot of manual oversight. But CNC machining has allowed craftsmen to focus more on assembly and tuning, leaving the machining to CNC operators. 

Automotives

Modern car manufacturers are able to produce up to 1200 cars in a single day. Meaning each car chassis would need to be machined and processed within a few hours. Car manufacturers like General Motors utilize several hundred automated CNC machines to achieve this ridiculous number.

Medical Equipment

The medical industry relies on CNC machining to produce everything, from precision instruments like dialysis machines to small equipment like endoscopes. Almost every modern medical equipment is either partially or fully manufactured using CNC technology.

Aerospace Components

We literally cannot list every single advancement made in the aerospace industry made possible by CNC machining. One of the biggest impacts can be seen in the manufacturing of rocket shells. Large CNC machines, the size of a house, were used to machine out enormous billets of aluminum to produce panels for space rockets.

Choose QBH Technology for CNC Machining Services

QBH is a state-of-the-art manufacturing company, operating out of China. We take pride in our expert and professional team of engineers, who are dedicated to producing the highest quality products. Our sheet metal and CNC machining services are second to none.

QBH offers flexible MOQs, fast production, and quick delivery for both stock and OEM parts. To get a customized quote, Contact us Now!

分类
Blog

What is On-Machine Inspection and How Does it Improve the Machining Process?

CNC machining is a simple tool with untapped potential. But you need other devices and techniques to get the most out of the machining process. On-machine inspection devices are one of the few crucial elements of modern manufacturing that can elevate your machining practices. These devices are integrated into a CNC machine and help maintain dimensional accuracy and precision. 

In this article, we give you a crash course in on-machine inspection and the improvements it brings to the machining process.

What is On-Machine Inspection?

On-machine inspection is the process of measuring workpiece dimensions using a device attached to the CNC machine. This system allows machinists to measure the accuracy of the part as it is being machined. On-machine inspection is a replacement for the older CMM (coordinate measuring machine) inspection system.

The most common type of on-machine inspection device comes in the form of a touch probe. Here the touch probe replaces the cutting tool and measures the workpiece on contact. There is a small ball on the tip of the probe shaft (also called a stylus). When this ball touches a surface it gives feedback to the CNC controller.

An alternative to the touch probe is a laser pointer system, which uses the refraction of lasers to measure the dimensions of the workpiece. Laser pointers are faster at taking measurements than touch probes. But they come at the cost of potential optical errors.

What does CMM mean?

Machining

CMM (coordinate measuring machine) is an inspection device that measures the dimensions of a machined part. You place the final part on the CMM bed and let the measuring probe take accurate dimensions in six degrees of freedom. The measuring probe can be a mechanical touch-sensitive one or an optical one that uses a laser or white light.

Traditionally you would measure the dimensions by hand using a reference scale or tool. But CMM allows you to take digital measurements using smart sensors and computer software.

Why is On-Machine Inspection Better than CMM?

CMM allows you to measure the final part after it has been machined. While on-machine inspection allows you to measure the part while it is being machined. Once a part has been incorrectly machined, it is very difficult to rework it into a usable form. Even if you can re-machine the part, it will come at the cost of time and disruption to the production cycle.

On-machine inspection will almost immediately measure dimensional errors during machining, allowing the operator to make appropriate corrections.

07 Benefits of On-Machine Inspection

Machining

There are several benefits to using on-machine inspection. Whether you’re replacing an existing CMM setup or trying out digital measuring for the first time. On-machine inspection will provide significant improvements to the machining process.

1 – Removing CMM Bottleneck

As mentioned above, CMM is a post-machining measure system. A typical production line involved part machining, then CMM inspection, and finally re-machine if needed. Each step here adds more time to the overall production period. Hence, CMM inspection becomes a major bottleneck to the manufacturing process.

A bottleneck refers to the part of the machining process that has reduced capacity. If all other sectors are producing parts at 100% capacity but the inspection is unable to keep up with the capacity, it will create a bottleneck.

On-machine inspection removes the clunkiness of CMM with a single one-step solution. It combines the inspection and machining phases together and avoids potential bottlenecks.

2 – Improving Production Times

An important aspect of manufacturing is production efficiency. Increased production efficiency will result in faster lead times and an increase in the overall production rate. A standard production line can be held up by a few factors. Machining errors, part inspection, and re-machining all increase production times. And increased production times will result in fewer parts manufactured in a single day.

By adding on-machine inspection to your CNC machines, you remove a majority of the machining errors and quickly perform part inspections. This results in a sharp decrease in the need to rework or re-machine parts. If all your parts are accurately machined in the first place then there will be no need for re-machining.

3 – Better Quality Control 

Quality control is a key factor that contributes to a successful business. Maintaining good and consistent product quality across your factory is a tough and expensive endeavor. Parts need to be inspected regularly to ensure that they meet a high standard of quality.

On-machine inspection will inspect the product dimensions as they are being machined. As all the parts are being inspected by a high-quality probe the quality control will be much higher than a manual eye inspection.

4 – Increasing Mold Making Accuracy

Molds are high-priority parts that require the utmost care during machining. Even minor errors and scratches can completely ruin a mold. As the mold will be used to make several thousand parts in its lifetime, accuracy should not be neglected.

On-machine inspection probes are particularly useful here as they can easily measure the internal cavities of a mold. High-performance injection molds are made from high carbon steel which requires low cutting speeds and expensive cutting tools. A mistake here will result in a huge waste of time and a complete scraping of the mold. 

Machining

5 – Improving Post-Processing Accuracy

Die-cast and forged parts always need some type of post-process machining. These manufacturing processes will produce minor variations between parts. Post-processing removes casting marks, improves surface finish, and makes dimensions more accurate.

Post-process machining is a crucial step that can make or break the final part. Accuracy must be maintained during the process to avoid failures. On-machine inspection allows the operator to maintain accuracy, through quick calibration and near-instant dimension inspection.

6 – Faster Recalibration of Cutting Tool

CNC machining produces accurate and precise parts, with very little room for error. But even the most sophisticated CNC machines will drift over time and will require recalibration. Recalibration is a standard procedure for heavy machinery and is also a time-consuming one. On-machine probing has two major benefits. 

a.It allows the operator to catch calibration issues earlier,

b.It helps expedite the recalibration process.

7 – Significantly Reducing Failure Rate

If you take all the above-mentioned benefits and apply them to a machining process, you will notice a drastic reduction in failure rates. An on-machine inspection device doesn’t directly affect the defect or failure of parts, but it reduces the chances of those failures.

Choose QBH Technology for Machining Services

QBH is an expert in manufacturing custom metal parts. We offer several OEM and ODM services in CNC machining, sheet metal fabrication, and metal stamping. Our excellent quality control and on-site inspection system yield exceptionally high-quality parts. We also provide a full dimensional inspection report before product delivery.

Don’t miss out on your best-in-class service and Contact us Now!

分类
Blog

Why You Need CAD Models for Metal Fabrication

Before using computer technology, engineers and designers relied on paper blueprints and schematics to flesh out new products. However, over the past few decades, CAD has been the go-to approach for designing basic parts for complex machinery.

Metal fabrication has solely relied on the benefits of CAD models for quick and efficient operation. This article breaks down the importance of CAD models for metal fabrication.

What are CAD Models?

CAD is computer-aided design and uses computers to guide and execute technical designs, drawings, and documentation. CAD models are 3D representations of object design in a virtual space. The CAD software maps out a detailed shape of the desired object with precise dimensions. The completed 3D CAD model can be directly sent over for fabrication.

CAM (computer-aided manufacturing)

A group of computer-controlled machinery having automatic manufacturing capabilities. CAMs are often used in conjunction with CMMs (computer measuring machines). CMMs are machines with sensors attached in place of cutting tools. These sensors move along the body of a part to determine its dimensions.

Importance of CAD Models

Metal fabrication

The importance of CAD models is evident from their prominence in modern-day manufacturing. Several industries, including computers, medicine, automotive, and consumer goods, all use CAD modeling. 

Although there are several contributing factors to the success and importance of CAD, a few stand out from the rest.

The following are a few key elements of CAD design that are responsible for its importance to metal fabrication.

1.Visualization

Before the widespread availability of CAD software and systems, the full scope of a design was limited to one’s imagination. The final design was difficult to share with others and only existed in the head of the designer. And the full extent of a design could only be grasped after fabrication.

CAD modeling has allowed designers and engineers to bring their designs to life in a 3D environment. This has brought unprecedented speed and versatility to the design and drafting phase. 

Engineers can now easily showcase their designs to manufacturers, who will better understand the final part, resulting in a much lower failure and defect rate. The importance of visualization cannot be understated. 

Once manufacturers saw the benefits of 3D models, there was no going back. 3D CAD models have become an industry standard in just a little while after its mainstream appearance.

Metal fabrication

2.Convenience 

An overlooked element of industrial work is convenience. After all, convenience is often associated with simplicity and laziness. But it is actually one of the most important elements for any manufacturing and design application.

CAD models are easier to edit, modify and improve. Unlike paper designs which rely on users to create a new set of 2D drawings for each small change, 3D models require just a few clicks. 

The convenience of quick editing is particularly useful for prototyping purposes where a part goes through several iterations and changes before being finalized.

Editing is not the only section of design that has seen improvements through CAD models. The modeling and designing phase itself has gone through a complete overhaul. Creating geometric shapes like circles, squares, triangles, etc., now takes less than a minute. Where in the past, you would constantly be at the mercy of compasses and protractors to finish the same task.

3.Productivity

CAD models have brought significant time savings to the design and manufacturing sector. Proper measurements are essential to fabrication, as they ensure minimum errors during cutting and thanks to CAD designs, all measurements are accurate and all cuts are precise. This minimization of error results in better time efficiency and higher productivity.

Mistakes in the design phase can lead to significant defects in the final product. Luckily CAD model dimensions can be checked with the click of a button, negating any chance of an error occurring.

CAD design is also quick and easy to learn and has lowered the barrier to entry for designers. You can now design a part or complete assembly on a single computer without fussing around with paper, pencils, and set squares. 

The convenience of CAD models is directly related to efficiency and time reduction, two very desirable outcomes.

Another benefit of using CAD models is convenient sharing and co-development. Instead of sending physical printed copies of a design, you can send the digital file to colleagues around the world and collaborate with them. An increase in productivity results in less time wasted, which in turn leads to cost savings.

4.Direct Fabrication

Soon after the invention of CAD modeling, manufacturers realized a possible companion to CAD models, CAM machines. Computing power had grown to a point where miniature computers could be attached to manufacturing equipment for automation purposes.

Thus, the CNC machining systems came into being. Machine operators would now input a CAD model into the system instead of long, complicated manual instructions, which resulted in manufacturing equipment that could work directly with CAD models to create accurate and precise parts.

This direct connection between CAD models and CNC machines is the biggest jump in manufacturing since the industrial revolution. All of our electronics, appliances, and vehicles are a direct result of direct metal fabrication using CAD models.

Conclusion

CAD models are the future, and they have occupied that title for several years now. They are convenient, flexible, and versatile tools that have led to a significant improvement in metal fabrication. 

Many of our modern-day products cannot be made without the use of CAD models. We hope this article has opened your mind to the importance and possibilities of CAD design in the manufacturing space.

Metal fabrication

Why Choose QBH for your Metal Fabrication Projects?

QBH is an expert in CNC machining and metal fabrication. We have been making high-quality OEM and ODM parts for clients all around the world. We specialize in CNC Turning, CNC Milling, Sheet Metal Fabrication, and much more. Our flexible MOQ and quick turnaround times give us an edge over the competition.

QBH also offers design services to clients, where our professional engineers guide you and help you turn your ideas into CAD models. So don’t let this chance slip by, and Contact us Now!

分类
Blog

The Importance of 2D Drawings in Manufacturing

2D drawings first become prominent during the 1800s. And until a few decades ago they were the only method of conveying product designs to manufacturers. With the advent of 3D modeling, you may think that 2D drawings have become obsolete, but that is not the case. Many industries still use 2D drawings alongside 3D models and some exclusively rely on them.

In this article, we explain the reasons for 2D drawings’ popularity and its importance in the manufacturing sector.

What are 2D Drawings?

A 2D Drawing is a two-dimensional flat representation of the six sides of a specimen (3D model). It shows all the details and dimensions of the specimen while following standards for drawing views. In the past 2D drawings were drawn by hand on large pieces of paper, but now it is mostly done on CAD (computer-aided design) software.

Types of 2D Drawings

There are two main types of 2D drawing which are known by their angles of projection. An angle of projection consists of three main elements, the object (specimen), the observer, and the projection paper. The difference between types of drawing depends upon the relative positions of the three elements.

First Angle Projection

In this system of drawing projection, the specimen is firmly placed between the observer and the drawing canvas (paper).

Third Angle Projection:

In a 3rd Angle Projection setup, the canvas (paper) is firmly placed between the observer and the specimen. This is the more commonly used projection system. 

2D drawings

Importance of 2D Drawings for Manufacturers

Multiple factors affect the operational flow of the production line. Design and modeling are the first of these key factors. 2D drawings bring several advantages to the production process, that ensure the importance of this design technique.

Following are a few elements of 2D drawings that cement their importance in the manufacturing space.

Adaptability

Complex geometries require additional machining processes. In order to reduce time and cost, it is important to introduce adoptable production skills to ensure good productivity and cost-effectiveness. 

2D drawings are compatible with both automatic CNC machining and manual machining practices. 

Tolerance stacking

Each manufactured part has some associated tolerance. When assembled into a complete section, individual tolerances add up to a significant level.

In this aspect, 2D drawing ensures the lowest tolerances level, as the tolerance for each section can be drawn separately. 

Flexibility

This is important to achieve better production efficiency and conditions. In terms of Drawing and designing products, it is essential to include these factors/changes in the production cycle.

2D drawings are simple and easy to change, modify, and edit. This also helps with prototyping as minor changes to each iteration become easier and quicker.

Error Identification and Reduction

Error reduction is an incredibly important step in the manufacturing process, even minor errors can snowball into major defects down the line.

Using 2D drawings, changes can be documented more easily and any potential error can be quickly identified.

Ease of Use

A low barrier to entry is critical for manufacturing, many old-school machine operators are still not comfortable with using computers. 2D drawings are an old and basic designing tool that almost all production teams know how to use. No need to mess around with complicated computer models and software. 

You can simply print the 2D drawing on paper and hand it to the CNC machine operator.

This decreases the error probability in the production process and decreases the time and cost of the overall product production.

2D Drawings vs 3D Modeling

Multiple factors differentiate 2D drawings from 3D models. The following are key factors that differentiate the two design techniques.

Dimensions

In a 2D drawing, each projected section/view is properly labeled with its dimensions. While 3D models often require you to select a specific surface to check its dimensions. 2D drawings, specially printed ones will have the proper dimensions in front of you at all times.

Portability

2D drawings can be easily printed on paper, rolled up, and carried around a work site. While 3D models require a table or laptop to be on hand all the time. A bonus to the 2D method is that you don’t need to charge your paper drawings.

Visibility

A minor issue of 3D models is their visibility in direct sunlight. If you are working on a project outdoor, you will be constantly under direct sunlight. Laptop and tablet screens have come a long way but they are still not good enough for outdoor use.

Size Restrictions / Readability

2D drawings are only limited by the size of the paper. Most industrial drawings are printed on A1-sized paper (23-3/8 x 33-1/8 in). 3D models are limited by the screen size of your laptop or other electronic devices, which are typical 13-17 inches in size.

2D-drawings

Using 2D Drawings for Machining

Here are a few examples of the applications of 2D drawings in machining workloads.

2D Drawings for CNC Machining

In most CNC machining projects you work on one side of the workpiece at a time. This requires accurate dimensions and views for the required product. 2D drawing provides this information with standardized systems of identification (dimensions, types). 

2D Drawings for Sheet Metal Fabrication

Sheet Metal Fabrication is a process that bends and cuts flat 2D sheets of metal to create a 3D final product. 2D drawings are the only viable method for designing sheet metal parts. 3D models here are only used for references of the final shape.

2D Drawings for other Machining Processes

Like sheet metal forming, many other manufacturing techniques rely on cutting flat sheets of material. Techniques like laser cutting, metal stamping, and CNC routing all benefit from 2D drawings.

2D drawings

Conclusion

Model-based drawings are limited by software availability and electronic displays. 3D models are quite beneficial for certain applications and environments. But 2D drawings are universally compatible with all manufacturing processes. 2D drawings are easier to share with others and are simple enough that even layman can understand them.

Why QBH Technology is the Right Choice for your Manufacturing needs?

QBH is one of the top OEM and ODM service providers in China. We offer several machining services including Sheet Metal Fabrication, CNC Milling, CNC Turing, and more.

Our customer confidentiality policy ensures your designs will be protected. We also offer drawing services to customers, where our professional engineers will guide you in designing your product.

So, don’t let this golden opportunity slip by, and Contact us Now!

分类
Blog

5 Important Advantages of using Rapid Machining

Over the past decade, the manufacturing industry has gone through a renaissance. Large-scale production is now only feasible for large mega-corporations. And most manufacturers are now offering customizable and rapid machining services for small to medium-sized companies.

Rapid machining is a complex and confusing process that overlaps with several other manufacturing techniques.

So here is a simple explanation of rapid machining and its importance in the manufacturing sector.

What is Rapid Machining?

Rapid machining involves machining components, objects, and prototypes in such a way as to minimize the total lead time. CNC machining is the gold standard for rapid machining. It is quick, precise, and flexible. For larger assemblies, CNC turning and milling are used for complex parts, while manual machining may be used for simpler components.

Rapid-Machining

Rapid Machining vs. Rapid Prototyping (RP)

Prototyping is the process of creating models of designs and improving them with further iterations. Most products go through multiple prototype iterations before landing on a final design that enters mass production.

Rapid prototyping utilizes various manufacturing techniques to improve production cycle times. The goal is to shorten production times between each prototype iteration. Eventually, the time savings will stack, leading to a significant decrease in time costs.

This method utilizes both CNC machining and 3D printing techniques, meaning rapid machining is essentially a type of rapid prototyping. As a matter of fact, before additive manufacturing and 3D printing became popular, CNC machining was the preferred method of rapid prototyping.

RP is a necessity for most upstarts and newcomers. Though you might be tempted to use additive manufacturing options, in most cases, rapid machining is the best choice.

Here is a brief comparison of CNC machining against the most popular 3D printing option, FDM (fused deposition modeling) and SLA (Stereolithography).

Rapid-Machining

Rapid Machining vs. Additive Manufacturing (AM)

Instead of cutting material from a block of the workpiece, additive manufacturing builds up parts by adding more material layer by layer. Additive manufacturing is a whole collection of manufacturing techniques and processes. Following is a brief breakdown of the seven basic types of AM processes.

1.VAT Polymerization (Resin 3D Printing)

2.Material Jetting

3.Material Extrusion (FDM 3D Printing)

4.Binder Jetting

5.Powder Bed Fusion (Metal Powder 3D Printing)

6.Sheet Lamination

7.Direct Energy Deposition

Most of these processes are extremely expensive, as they require large, complicated machines and exotic material choices. 

Rapid machining uses standard CNC milling and truing operations, which are time and cost-effective alternatives. Additionally, unlike most AM processes, CNC machining uses standard commercially available materials. Making material sourcing much easier and quicker. Powder bed fusion specifically uses special metal powders that are very difficult to produce and has an exponentially higher cost.

Following is a brief comparison between rapid machining and additive manufacturing.

Rapid-Machining

Rapid Machining vs. Traditional Manufacturing (TM)

Just like additive manufacturing, traditional manufacturing is composed of several processes. The biggest drawback of TM is time, and prototype development can often take years to finish. The traditional manufacturing industry is aimed at mass production. Thus, it is not suited for customizations and changes, leading to a stagnancy in innovation.

Some common traditional manufacturing processes include the following.

  • Die-Casting
  • Injection Molding
  • Machining (CNC and Non-CNC)
  • Plastic Forming
  • Etc.

As you can see, TM also includes the CNC machining process. However, the rapid machining approach is a complete overhaul of the traditional method. Where traditional manufacturing relies on long conveyor belts and single-task CNC operations, rapid machining uses short setups designed for quick tool swaps and material changes.

Following is a brief comparison between rapid machining and traditional manufacturing.

Rapid Machining

Why is Rapid Machining so Important?

Rapid machining has always been the go-to manufacturing method for designers and engineers. However, recent years have seen an expansion in the rapid machining market, leading to a wider client base for the process. Rapid machining has become an integral part of the manufacturing sector.

The importance of rapid machining can be credited to the following factors.

Rapid Machining

Availability

Rapid machining services are more easily accessible to people all over the world. With mature global shipping routes, you can get machining services from other countries with the minimum effect of lead times.

Traditionally you would have had to track down large factories or manufacturers and spend time and money negotiating with them. But now, you can contact any of the several global rapid machining service providers.

China alone has several hundred manufacturers that offer rapid machining services and are just one click away.

Convenience

Modern product design revolves around digital files made using CAD (computer-aided design) software. CNC machines, like the ones used for rapid machining, are natively compatible with CAD files. Prototyping is as simple as sending a CAD design to the manufacturer and waiting for a day or two.

Additionally, if you need to make minor changes to the design, you can adjust it on the CAD file and resend it to the manufacturer.

The future of design revolves around 3D models that can be quickly machined using services like CNC turning and CNC milling.

Customization

Aside from ease of availability and unparalleled convenience, rapid machining is also very customizable. Unlike traditional manufacturing, where you need to create expensive molds for products, this process is more streamlined.

Since CNC machining is a mold-less process, customizations and changes are very easy to implement. Hence, rapid machining is the most popular method for prototyping. 

Rapid machining results in prototypes that are very close to the final product.

Quick Lead Times

Design and fabrication of parts have always been a long process. The production cycle typically has the following steps.

1.Concept

2.Designing

3.Early Prototyping

4.Testing and Verification

5.Working Prototypes

6.Final Testing and Evaluation

7.Marketing

8.Full-scale production

9.Distribution.

Rapid machining improves several steps in the production cycle. Both prototyping and final production are very time-consuming processes. And most people spend over a year working on these steps. Luckily rapid machining can cut your lead times in half.

Cost

Part design and manufacturing can be very expensive, especially for smaller businesses. Low-volume production runs are particularly harsh on small businesses. Traditional manufacturers are only price-competitive for mass production items.

Rapid machining is aimed at small and custom machining services. The cost per part is significantly lower for small volume and one-off custom designs.

Conclusion

Rapid machining services are availed by several commercial industries. Automotive, consumer goods, aerospace, medical, architecture, etc., all benefit from rapid CNC machining services. Consider your application before selecting the right manufacturing process. Most cases will benefit from rapid machining, but some rare cases might be better suited to traditional processes.

For rapid prototyping and low to medium-size productions, CNC machining is the ideal choice. But for mass production requirements, traditional manufacturing is more beneficial.

Why pick QBH for your Rapid Machining needs?

If you are looking for high-quality and precision rapid machining services, look no further than QBH Technology. We offer best-in-class CNC Machining OEM and ODM services. Additionally, we offer low MOQs on our CNC Turning, CNC Milling, and other services.

QBH also has a confidentiality policy that protects customer designs. So why waste time? Take advantage of our rapid machining services and Contact us Now!

分类
Blog

The Definitive Guide to Technical Drawings

Drawings are the best way to convey your design ideas to a manufacturer. The more detailed a drawing is, the more information it can convey. In the manufacturing sector, technical drawings are standard for sharing design detail. Technical drawings are less about technique and more about strategy.

We have broken down the process of details of technical drawings into simple and easy-to-understand bits. Here is a detailed guide on Technical Drawings

Technical Drawings

What are Technical Drawings?

Technical drawings are highly detailed diagrams of objects that convey all the necessary information about the construction of the said object.

Technical Drawings

What are technical drawings used for?

Technical drawings are used in various engineering and architecture-related fields. Technical drawings carry essential information necessary for construction and future repair.

Technical Drawings

Difference between Technical Drawings and Engineering Drawings

Technical drawing is a broad term that applies to many industries. While engineering drawings are a type of technical drawing. 

Engineering drawings are primarily used to detail the geometry information of objects. For complex objects, several drawings are required to give all the necessary information.

Technical Drawings vs. 3D model

3D models give a full 360° view of the final product. These detailed models are helpful but only to a certain degree. You can only view 3D models on a digital screen running on a reasonably powerful microprocessor. Dimensions cannot be labeled directly onto the 3D model as it would take up a lot of screen real-estate. Instead, you would need to manually click or tap the desired area to find details about its dimensions and tolerances.

Technical drawings present you with detailed views of an object from all six sides. Additionally, technical Drawings can be viewed on a digital screen or printed onto paper.

Technical Drawings

Basic Components of an Engineering Drawing 

When making a technical drawing, you need to be considerate of lines and views. Select the proper lines to convey the correct information. And use a view that shows off the maximum amount of object detail.

Different Types of Lines

The first and foremost important component of a technical drawing is line choice. Here is a brief guide to line thickness and line design. Each type of line corresponds to a different function in a technical drawing.

Continuous Thick Lines

Continuous thick lines are used to draw the outline of an object. This includes the perimeter, edges, and internal cutouts. 

Continuous Thin Lines

Continuous thin lines are used for a broader application. They represent everything that isn’t the outline of the object.

Thin lines are used as projection lines, keeping the six orthographic views of the object inline. Since dimension lines run parallel to the main object outline, we use continuous thin lines to distinguish between the two line types visually.

Thick Dashed Lines

Thick dashes are commonly associated with hidden lines. Hidden lines represent cutouts, holes, or sections that lie behind a view.

Chain Thin Lines

Chain lines represent the center lines, symmetry lines, and trajectory lines. Center lines are the most common use of chain lines. Two chain lines intersect at the center of a hole or cutout.

Zig-Zag Lines

Zig-Zag lines shorten long object outlines to fit within a specific area. The technical term for shorting long lines is Break Lines.

Here are some additional line types that can add further detail to your technical drawing.

Technical Drawings
Technical Drawings

Types of Views

For technical drawings, Views refer to the depiction of objects in the 2D plane. There are various methods of depicting your object design, but the following are the most popular ones.

1.Isometric View

Isometric view is a method of depicting three-dimensional objects in a two-dimensional space. An isometric view is essentially the same as a photo of the object. The angle of the photo here is such that you can see at least three sides of the object.

Isometric views are most used for simple objects with very little complexity in design.

Technical Drawings

2.Orthographic View

An orthographic view is the most common and helpful depiction of a drawing. Basically, you take an image and break it down into its six sides. This allows you to draw each side of the object in detail and showcase information from all sides.

An orthographic view can be further divided into two subcategories.

a.1st Person Projection

b.3rd Person Projection

Both methods are similar, and the only difference is in the placement of the side and top view in the technical drawing.

Technical Drawings

3.Flat Pattern

Objects that require sheet metal fabrication can be drawn as flat patterns that can be stamped out of metal sheets. These flat patterns can then be bent into the appropriate shapes.

This method is not essential since it is the same as orthographic projection but with different placements of side views.

Technical Drawings

4.Section View

Section view adds another diagram to the drawing, showing the object’s internals if it was cut in half (sectioned).

Technical Drawings

5.Cutout View

Same as section view, but instead of an entirely bisected view, the diagrams selective shows cutout sections of some areas.

Technical Drawings

6.Detailed View

The detailed view uses an additional diagram to depict a zoomed-in view of the object.

Technical Drawings

How to draw a Technical Drawing?

Technical drawings have existed since the times of the earliest civilization. Ancient Chinese and Egyptians made technical drawings using ink and rice paper (or papyrus). Modern-day technical drawings rely on CAD (Computer-Aided Design) software to achieve higher precision and technical refinement.

However, hand-drawn technical drawings are still popular among many manufacturers. They are a quick and easy way to generate a draft without a computer.

Hand Drawn Method

You can draw a basic technical drawing using nothing more than a pencil and a piece of paper. The paper should be A1 size or larger for accurate and detailed drawings. Outline the object using thicker lines and use thinner lines for projection lines and minor details.

CAD Software Method

CAD software allows you to input exact dimensions into the computer to draw shapes. You can draw lines at every angle possible and easily copy lines or entire drawings. The most significant advantage of CAD drawings is that they can be exported into different file types.

The following are common file types that can be created using CAD software.

  • PDF –  For easy sharing and printing.
  • STL – For Slicing and 3D printing.
  • G-code – For CNC machining.

Steps for making a Technical Drawings

The following are the basic steps involved in making a technical drawing. These steps can be applied to both hand-drawn and CAD methods.

Step 1

Carefully look at your object and determine a “Front View.” The front view is the center of your drawing, and all other sides will be designated right, left, top, or bottom.

Technical Drawings

Step 2

Now using either 1st Angle Projection or 3rd Angle Projection, determine the other sides of your object.

Technical Drawings

Step 3

Using the proper lines, draw the Front View of your object. Use hidden lines for any details that are obscured by parts.

Technical Drawings

Step 4

Using projection lines, define the general position of the side views relative to the Front View. Then draw the Left or Right View of the object. Your side views should have the same vertical height as your Front View.

Technical Drawings

Step 5

Now, using the same technique as before, draw the Bottom & Top Views of your object. Your top and bottom views should have the same horizontal height as your Front View.

Technical Drawings

Step 6

Draw the Rear View if necessary. If your Front View and Rear View are identical, you can skip this step.

Technical Drawings

Step 7

Go through your drawing once, and look for any missing details. If a hole is visible in the Front View, you need to show it in the side videos as Thick Dotted lines.

Technical Drawings

Step 8

Label all the dimensions in your drawings. Reference the dimension units (inches or mm) in the top or bottom right corner of the drawing. Any additional details regarding the object should be mentioned here as well.

Technical Drawings

Step 9

If you drew the technical drawing, save it on your computer in the desired file type.

Manufacturing Using Technical or Engineering Drawings

Now that you have mastered the art of technical drawings, it is time to put your skills into practice. Technical drawings can be used with most manufacturing techniques with little to no difficulty.

But some manufacturing processes will benefit from additional tweaks to your technical designs.

CNC Machining

Manufacturing using CNC machines is slightly different from other methods. CNC machines can use multiple cutting tools on a single object. And each tool will come with different internal tolerance.

  • Properly mention the different tolerances for different sections of the object.
  • Hole and cavity details should include information about countersinks and variable diameter.
  • If your design includes thread sections, use standard thread specifications.

Sheet Metal Fabrication

As discussed previously, you can use both orthographic and flat pattern drawings for sheet metal fabrication. Both convey the same amount of information, and the only difference is visual depiction. Either way, you need to include some additional information.

  • Mention the desired gauge (thickness standard) of metal.
  • Properly disclose the welding locations.
  • Dimensions should allow for bending and welding tolerances.
  • Mention grain bend direction if possible. Bending parallel to the grain requires less strength but results in a weaker being and vice versa.
Technical Drawings

Aluminum Extrusion

Extrusion techniques are generally suited for simpler designs. Most technical drawings need minimal alteration to be compatible with the extrusion process.

  • Mention the desired stock (billet thickness) size.
  • Grain direction is crucial for extruded metal parts.
  • Holes need to be adequately detailed in the technical drawings.
Technical Drawings

Conclusion

Technical drawing may seem complex and challenging, but the process becomes much simpler once you know the basics. When making technical drawings, make sure to include all the necessary information. Dimensions and tolerances are crucial bits of information, but material choices and finishing options are also appreciated. Keep your drawings as clutter-free as possible, evenly space your side views and be mindful of hidden lines.

Your technical drawings are only as good as the manufacturer’s skills. For high-quality metal parts manufacturing services, we recommend checking out QBH Technology. We offer all sorts of Sheet Metal , CNC Machining, and Stamped Metal fabrication services.

We offer competitive prices and flexible minimum order quantities. Additionally, QBH respects customers’ confidentiality and keeps your private designs safe. To achieve your product goals and get best in class services, Contact Us Now!

分类
Blog

How Custom Sheet Metal Increases Your Profit

Sheet metal is a flattened piece of metal that is used extensively in the electrical and manufacturing industry. Sheet metals can be made out of various metals or alloys such as aluminum, steel, copper, brass to name a few.

To make the best use out of sheet metal, they are fabricated using various cnc machining processes such as cutting, punching, welding and bending. Fabrication also helps to keep the manufacturing cost low, the quality of material great and production on a large scale.

Customizing a sheet metal helps to fulfill the objective of designing pieces of metal as per the desired industrial requirement. Since the designs are precise, they facilitate large-scale production with uniformity and without compromising on quality. The products made using these custom sheet metal designs can also be used at a later stage to modify or repair the existing product, thereby increasing longevity and minimizing loss.  

sheet metal

Sheet Metal Customization Methods

QBH technology and other kinds of methods are used to customize the metal sheet as per the requirement.

Cutting

Cutting is one of the most basic methods to customize a metal sheet. Metals can be cut by sawing, shearing, using a high pressure water jet, etc to customize the sheet metal as per the specific requirement.

Bending

Bending is achieved by subjecting the metal sheet to hydraulic brakes that are set at certain angles. The metal sheet is then placed in the brakes and applied force to bend it at the specified angles.  

Rolling

Rolling is either done using a hot-rolling process or a cold-rolling process. The hot-rolling method is used to create thin metal sheets whereas the cold-rolling method is used to make thick metal sheets.

Welding

Welding is an important method to customize a metal sheet. Once the desired shape is attained, welding helps to retain that shape of the metal so that it does not get deformed.

Shrinking and Stretching

Shrinking is done to smoothen out the edges and other irregularities in the shape of the metal. Stretching on the other hand is done to stretch a metal sheet and get the desired shape.

Fastening

Holding tools like nuts, screws, etc are used to hold the metal sheet tightly during the customization process.

Hydroforming

Hydroforming is a method in which the metal sheet is subjected to high pressure fluid to give it the desired shape.

Punching

Punching is done to give the metal sheet a uniform shape throughout and remove any holes in the sheet.

Assembling

Assembling is often the last step of customization and is achieved by welding, binding and bending to get the desired outcome.

sheet metal

How Custom Sheet Metal Increases Profit?

Be it the automotive industry, electrical industry, utility industry, medical industry, or even agricultural industry for that matter, companies often prefer a custom metal sheet that perfectly suits their production requirement. Sheet metal can be cut, punched, bent, stamped, welded, rolled, cnc machined, drilled to get the customized output.

A custom metal sheet helps them to scale up production at a low cost as there are fewer to no manufacturing challenges and the output is precise. Furthermore, companies can keep being innovative and create better designs as they know they can completely rely on custom sheet metal to replicate the designs.

Durability

Choosing the right kind of metal and giving it the right thickness, a customized sheet of metal increases the lifespan of the parts to a great extent. Add to that the property of metal sheets being corrosion, heat and rust-free and you get more out of your products than the set target. A great reason to shift to a custom sheet metal approach.

Fewer Limitations More Productivity

There is no limit or restrictions when it comes to customizing a metal sheet as per the design requirement. The entire process of customization through cutting, drilling, welding, etc takes less time thus enabling a higher rate of production at a low cost. Furthermore, this can be achieved using any kind of metal thus providing the company’s flexibility to choose from the metal suiting their manufacturing requirement.

Faster Turnaround Time

With the usage of QBH technology and other automation tools such as cnc machining, it is now possible to customize sheet metals with great precision in less time. This feature enables companies to roll out products quickly into the market and meet the growing demands of their customers.

Ease of Transport

Custom-made sheet metals can be customized in such a way that their weight is less as compared to a non-customized metal sheet. This option makes it easier to transport such metal sheets.  

High Precision

The process of customizing a metal sheet can be streamlined to get the same output again and again with great accuracy and precision to suit the specific requirements of the industry. Thus companies no longer need to remain stuck with standard designs, instead, they can use custom designs and meet the market requirements at ease.

sheet metal

Easy Repair

More often than not, after say, 10 years or so old equipment tends to become of no use. This does not hold true for custom sheet metals since they can be easily re-engineered and be of use again. The old custom sheet metals can also be easily recycled thus they are environmentally friendly.

So in totality, adapting to using custom sheet metals is not at all a complex process. It is very much viable and makes absolute sense, now that all the cnc machining tools and other automotive methods are in place. The shift to custom metal sheets will give you the flexibility and the license to go for the kill and carry out large scale production that is bound to give you great benefits and greater results.

Thus, those companies looking to bring their production in line with the market demands, those who wish to innovate in terms of design, those who want to be a leader in the manufacturing space and bring new efficient products into the markets should definitely shift to custom sheet metal to meet all their production goals and increase their profit.

分类
Blog

Simple & Easy Guide to Plastic Extrusion

Extrusion is one of the earliest and most cost-efficient manufacturing techniques. Advanced modern manufacturing techniques and materials have led to increased interest in plastic extrusion manufacturing. Thermoplastics, the primary choice in plastic extrusion, are lightweight, versatile, and inexpensive.

But the materials choices and variations in the extrusion process can be very complex and confusing.

So, here is your basic guide to help you better understand the Plastic Extrusion Process.

Plastic Extrusion

What is Plastic Extrusion?

Extrusion is the process of material forming where the application of force pushes material through a small orifice or die. Plastic extrusion is a manufacturing process where melted plastic is pushed through a die to form a continuous profile shape.

Process of Plastic Extrusion

Here is a brief overview of the extrusion process for plastic materials.

Plastic Extrusion

Step 1

The raw plastic material is formed into small pellets called nurdles (also known as plastic beads or resin). These nurdles are approximately 5 mm in size and often contain color or UV protection additives.

Step 2

Once the raw plastic beads are pre-processed, they are steadily fed into the hopper. The hopper base is conical and connects to the barrel via the feed throat, a small opening on the barrel’s surface.

Step 3

Once inside the barrel, the plastic beads are gradually heated to their melting point. The heating is done through several heating elements placed across the length of the barrel. The gradual increase in temperature allows for controlled melting and avoids overheating.

Step 4

A large rotating crews cover the inside of the barrel. As the screw rotates, it moves the plastic beads towards the front of the barrel.

Step 5

At the front end of the barrel lies a screen used for filtering any unwanted contaminants in the now molten plastic. A breaker plate reinforces the weaker screen and ensures it can withstand the high pressures.

Step 6

Once the molten plastic is filtered through the screen, it goes into the die shape, sometimes through a feed pipe. The die determines the final cross-section (profile) of the extrudate.

Step 7

With the plastic extruded, it is set to cool down to room temperature. Passive air cooling is adequate for thin profile parts, but thicker parts require water cooling.

The extrusion process is versatile and can be modified to suit specific applications. By simplifying changing out the die, you can extrude an entirely different part using the same machine.

Types of Plastic Extrusion

Following are some basic types of the plastic extrusion process.

Tubing Extrusion

This type of plastic extrusion is used for making tubes, pipes, and other cylindrical shapes. Here a positive pressure is applied to the center of the die and negative pressure to the outer diameter of the die, resulting in the formation of a pipe shape.

Sheet or Film Extrusion

Sheet extrusion uses a T-shaped or coat hanger-shaped die to extrude a thin and flat plastic sheet. Sheet plastics are used in various industries, the most common one being thermoforming or vacuum forming.

Blown Film Extrusion

Blown film extrusion is used to manufacture even thinner films of plastic. Here a pneumatic system is attached to the end of the die that uses airflow to manufacture a thin and consistent plastic film.

This method can use three types of dies for extrusion.

1.Spider 

2.Annular (Crosshead)

3.Spiral

Over Jacketing Extrusion

Over jacketing involves coating a long wire or cable of material with plastic. Here a wire is fed through the die, and the die pushes the molten plastic around the wire.

Extrusion Coating

Extrusion coating is the same process as over jacketing, but for flat pieces of material. The most common example of this manufacturing process is Tetra Pak packaging, where paper is coated with a thin plastic film.

Co-Extrusion

Co-extrusion involves two or more plastic materials being melted and extruded through the same die. This extrusion method is a more advanced form of other plastic extrusion processes. 

(over-jacketing, tubing, sheet, and blown film)

Extrusion Plastics

The extrusion process is compatible with many thermoplastic bases. As long as the plastic material can be reliably melted without reaching the thermal decomposition point, it can be used in plastic extrusion machines.

Here is a list of commonly used extrusion plastics.

Plastic Extrusion

In some rare applications, an elastomer or thermoset plastic is more beneficial instead of using thermoplastics.

Applications for Extruded Plastic

Extruded plastic is used in several industries and our daily lives. Here are a few examples of extruded plastic parts.

Plastic Extrusion

Benefits of Extruded Plastics

  • Plastic extrusion can be used to manufacture large lengths of tubing and piping. 
  • Extrusion is particularly suited to high-volume manufacturing.
  • Extrusion is a very cost-efficient process
  • Relatively quick turnaround time.

Aluminum Extrusion

Aluminum extrusion uses the same basic operating procedure as plastic extrusion but with a few small changes.

1.The base aluminum is in the form of a large Billet instead of small Pellets.

2. Aluminum is heated to a high temperature but not melted.

3. Extrusion requires several tons of force, applied through a hydraulic mechanism.

Conclusion

Plastic extrusion is a quick and reliable mass manufacturing process suited to various applications. A few variations in the extrusion process result in different end products, but the base procedure remains the same. When selecting the desired plastic material, you must ensure that said material is compatible with your chosen extrusion process.

If you are looking for high-quality extrusion services, we recommend checking out QBH Technology. We offer a wide range of manufacturing services, including CNC Machining, Sheet Metal Fabrication, and Laser Cutting. Additionally QBH offes market leading post-processing and surface finishing options.

So, don’t miss out on our best-in-class services, and Contact Us Now!

分类
Blog

How does CNC Machining Ensure Precision in Making Complex Parts?

CNC machining is a cornerstone of modern manufacturing services. Along with quick turnaround times and versatility, CNC machining is also known for its excellent precision. Of course, precision becomes more important when matching a complex part. However, an increase in part complexity will increase the failure chance during machining.

Thus we present to you the benefits of CNC machining in complex parts.

What is CNC Machining?

CNC machining stands for Computer Numerical Controlled machining. Here a computer (microprocessor) is responsible for the accurate and precise motion of the cutting tool. The tool subtracts material from a solid blank (called a workpiece) until the desired geometry is achieved. CNC machining is an incredibly precise and time-efficient manufacturing method.

Complexity in CNC Machined Parts

Here are the critical elements of CNC machining that contribute to part complexity.

CNC Machining

a.Geometry

Geometry complexity refers to the number of design elements present in a single part. These design elements consist of holes, cuts, pretensions, undercuts, etc.

b.Size

The part size itself is not responsible for part complexity but is still a significant contributor. Machining a larger-sized part is considerably easier than machining the same design but at a smaller size. Additionally, large parts can be machines at a higher speed than smaller parts.

c.Machining

Machining is a design-dependent property of CNC. Complex geometric designs require machining using multiple cutting tools and changing workpiece orientation. Some designs cannot be machined using standard 3-axis CNC machines.

d.Tolerances

Tighter tolerances for any design will slow down the manufacturing process. As tolerances shrink, the amount of machining precision requires increases exponentially. Additionally, the same tolerance for a smaller part will result in added complexity than it would for a large part.

Precision in CNC Machining

Precision is the quality of a device that is responsible for consistent results upon repetition. In short, CNC precision ensures that every machined part has similarly accurate dimensions.

CNC machining precision is the result of several design choices. 

The following are critical elements of a CNC machine that increase the overall machining precision.

CNC Machining

1.Microprocessors

The compute element of a CNC machine is controlled by a microprocessor (computer). This little chip can make thousands of calculations per second, resulting in precise and accurate instructions to the motors.

Microprocessor technology has increased by 100 times in just the past two decades. With faster processing, CNC machines can cut material with even greater precision and less time.

2.Servo Motors

Motors are responsible for carrying out cutting instructions provided by the computer (microprocessor). However, motors are inherently inaccurate as their momentum keeps them from stopping at precise locations.

A servo motor uses specific electric currents to start and stop. This fine-tuned control system allows servos to carry out movement instructions provided by the computer accurately.

3.Multi-axis CNC Machines

Finally, the most significant contributor to modern CNC precision is multi-axis machines. A typical CNC machine only moves in three axes (directions), Up-Down, Left-Right, and Front-Back. This means operators will have to adjust the workpiece and change its sides for complex designs, which brings unnecessary variables and impacts the overall precision of the machine.

6-axis machines can move in the three directions but also rotate in the three directions, resulting in total coverage of the workpiece. You can cut complex designs into the workpiece with the click of a single button, with no need for operator guidance.

Benefits of Precision CNC Machining Service

CNC Machining

CNC Prototyping Machining Service

Prototyping is a necessary step in product development but a time-consuming and costly practice. Prototypes often need very precise tolerances so the design can be as close to the final product as possible.

CNC machining solves most drawbacks associated with prototyping. The precision of CNC allows for rapid turnaround times, meaning you can decrease the lead time between the design phase and the production phase.

Precision CNC Milling

Milling is generally restricted to simpler tasks, like surface milling or drilling. But newer multi-axis CNC machines are incredibly versatile and can create complex designs with unparalleled precision.

For example, monolith aluminum blocks are used to manufacture high-performance turbine blades. These turbine blades require utmost precision and accuracy. Each blade must be the same as the others.

Precision CNC Turning

Turning is performed on a horizontal machine called a Lathe. It is commonly used for objects with significant length-to-height ratios. CNC turning is an excellent option for machining threads, pipes, deep cavities, etc.

Since turning is performed on large objects, poor precision can have a snowball effect and result in large variations between parts. CNC turning ensures consistent and accurate machining operations.

The most significant benefit of precision turning can be seen in machined threads. Threads have standard sizes, and your parts must adhere to these strict standards. Luckily precision turning on CNC machines leaves no room for errors.

Surface Finishing

Machined parts often undergo secondary processing called finishing. Finishes like powder coating and painting can add 0.05 to 0.1 mm to the final thickness. While polishing can reduce the thickness by the same amount. These finishes have a tendency to exaggerate surface imperfections.

Your parts need to be machined as precisely as possible using a CNC machine for even and consistent finishing.

High Volume Production

CNC precision also proves extremely useful for large-scale productions of complex parts. CNC machines ensure each part closely matches the other, with as little variation as possible. This precision also results in quicker turnaround times and shorter lead times.

CNC Machining

Conclusion

Precision is an often overlooked benefit of CNC machining. However, after reading this article, we hope you better appreciate CNC’s precision. CNC machines will maintain their precision irrespective of your cutting tools, design geometry, and tolerances. You will need to rely on more advanced CNC machines, like a six-axis CNC, for even better precision.

If you are looking for precise and accurate CNC services, look no further, QBH Technology is your one-stop-shop for any and all CNC services. We offer precision CNC Turning, CNC Milling, and several other machining services. 

Don’t miss out on our best-in-class service, and Contact us Now!

分类
Blog

What are Jigs and Fixtures?

If you are someone belonging to the manufacturing industry or have even an iota of interest in the manufacturing world, then you must have surely come across the terms Jigs and Fixtures. Jigs and fixtures are essential tools deployed in the manufacturing process to develop different pieces of CNC machined parts. Though their roles are different, though they are created using different manufacturing techniques, essentially jigs and fixtures essay the role of producing products with great precision. Jigs and Types of Jigs

Jigs are devices that hold the workpieces and guide the various CNC machining tools to perform their specific tasks.

Jigs serve the major purpose of providing products with the features of modification, interchangeability and precision.

Jigs are lightweight, cost-effective products used extensively in QBH technology and automation tools to carry out various processes such as drilling, cutting, etc.

Types of Jigs:

Drill Jig: One of the most common types of jig, the drill jig is used to drill holes at specific locations.

Template Jig: Template jigs have holes in them through which the cutting tool is guided. These can be easily mounted onto the workplace.

Wooden Jig: As the name suggests, wooden jigs are specifically used to create wooden work profiles.

Plate Jig: Apart from having holes to guide the cutting tool, plate jigs are also braced with drill bushes. Angle plate jig, which is a type of plate jig is used to make diagonal holes.

Leaf Jig: Leaf jigs have a hinged leaf that comes with a provision for opening and closing them. This feature facilitates faster loading and unloading of products.

Diameter Jig: A unique type of jig made specifically to enable the drilling of rounded workpieces.

Fixtures and Types of Fixtures

While jigs serve as the guiding factor for tools, fixtures are holding devices that firmly hold and support the workpiece at a certain position to carry out the manufacturing process. The CNC machined fixtures are accurate, improve the speed of manufacturing and give the desired output. Fixture finds its application in multiple CNC machining processes such as grounding, turning, and cutting to name a few.

Types of Fixtures

Drilling Fixture: Drilling fixtures have both bushes and holes and are often paired with jigs.

Turning Fixture: These fixtures are mounted on the machine table in such a way that they can rotate and thus are used to make comparatively complex products .

Milling Fixture: As the name suggests, milling fixtures are used to perform a number of milling operations and are secured on the work table with fasteners.

Grinding Fixture: Another kind of fixture which is used majorly to support and hold the parts during grinding operations.

Components of Jigs and Fixtures

The cnc machined fixtures and jigs are composed of several components or sections such as follows:

1) Body: The body of jigs and fixtures is generally strong to withstand strong force.

2) Clamping Devices: Both the jigs and fixtures have clamping devices to hold the workpiece securely and to carry processes such as cutting.

3) Locating Devices: These are in the form of pins to locate and place the jigs and fixtures easily.

4) Bushings: Bushings are present in both jigs and fixtures and they facilitate the holding and cutting process.

While the components of jigs and fixtures are more or less the same, individually they can be made using different materials as per the requirements and desired outcome.

Materials Used for Jigs and Fixtures

With the advent of QBH technology and other automation tools, the same material can be used to produce jigs and fixtures. Different materials bring their own characteristics and properties to the produced jigs and fixtures.

1) Hardened Steel: These are used to make water-resistant and non-shrinking jigs and fixtures.

2) Cast Iron: Jigs and fixtures made with cast iron can be self-lubricated and are used to build odd-shaped materials.

3) Nylon and Fiber: Nylon and fiber are used for jigs and fixtures to provide them with a soft lining for clamps so that there is no damage caused due to clamping pressure.

4) Phosphor and Bronze: Used majorly to form durable nuts and screws used in jigs and fixtures.

Apart from these materials jigs and fixtures are also made with alloys, plastic, mild steel, nickel, etc.

Fixtures

Designing Considerations for Jigs and Fixtures

Since cnc machined jigs and cnc machined fixtures essay a very significant role in the manufacturing world, it is imperative that they adhere to certain design considerations. Following these design considerations ensure the large-scale production of products with accuracy and precision.

Position: The workpieces should not be positioned in a plane that has more than 3 points. This helps to protect the workpiece from getting deformed. Furthermore, the workpiece should be placed such that it is easily located, thus saving time, effort and overall cost of production.

Well-maintained Equipment: A well-maintained equipment, should be deployed so that the production is smooth without any interruptions and delays.

Precise Design: For precise and accurate results, it is necessary that the jigs and fixtures are designed in such a manner that apart from the correct option, there is no other option or way for the tool and operator to handle it.

Streamlined Process: Less time translates to more output. Jigs and fixtures must be designed so that all the processes such as loading, clamping, cutting, are streamlined thereby reducing the time to a great extent.

Weight: Use jigs and fixtures that are low weight, so that they become easy to handle and operate. At the same time, make sure the material is a good one that offers rigidity and sturdiness.

Coolant: Designing jigs and fixtures with a provision to cool them is very useful to reduce the time in manufacturing the final product.

Hardened Materials: The tools, locating surfaces and mounting tables should all be hard and stable to provide much needed support during the process and ensure accurate results without any deformity and breakage.

Clamping Device: There can’t be any compromise in the effectiveness that jigs and fixtures bring to the workpiece. Thus, it becomes important that the clamping devices should be able to hold the workpiece firmly and at the same time ensure there is no breaking or disorientation caused.

Interchangeable Parts: Interchangeability is one of the highlighting and fundamental properties of jigs and fixtures. Thus, the locating and supporting surfaces should be standardized so that there won’t be any problem in producing them with tweaks or as it is in the near future.  

Safety is a Key: Safer the jigs and fixtures, less is the worry and the better it is for the tools and operator to get the most out of the manufacturing process.

Difference Between Jigs and Fixtures

In the manufacturing industry,  “Jigs” and “Fixtures” are often termed together since they are made up of the same material and are also equally used for mass production. However, there are a good number of ways in which a jig is distinguished from a fixture.

Fixtures

Jigs and fixtures in unison, increase the efficiency, quality, and output of CNC machining. Being easy to use and easily modifiable, Their unparalleled features find great application in the automotive, electrical and manufacturing industries.

So to conclude, jigs and fixtures are the backbones of the manufacturing industry as together they guide various cnc machining tools and at the same time also support them to carry out their functions precisely, ensuring accurate, large scale and cost-effective production.

But to get the most out of the jigs and fixtures, the operators should ensure that the several design aspects and considerations are in place and the type of material used is specific to the desired output.

分类
Blog

Which Material is Best for Your Medical Prototypes?

Prototyping is a huge part of medical research and development. While general-purpose prototypes can be manufactured using any number of materials, medical devices are limited to biocompatible materials. Choosing the suitable materials for your medical prototypes can be a challenging endeavor.

So here is a detailed guide on material selection for medical prototypes.

What is Biocompatibility?

The biocompatibility of a material is its ability to exist in harmony with living tissue. The material must not degrade upon interaction with the tissue or damage the tissue. Biocompatible materials are often used for medical implants, like knee replacements.

Biocompatible materials can be both metallic and non-metallic in nature. However, materials must pass a biocompatibility test to get a biocompatibility certification. ISO (International Organization for Standardization) is responsible for a majority of global biocompatibility certifications.

Different Biocompatible Materials

Any material that passes the biocompatibility test is safe to use for internal medical implants. Here are some common biocompatible materials used for medical prototypes.

Metal

  • Titanium
  • Stainless Steel

Non-Metal

  • PC (polycarbonate)
  • PEEK (polyetheretherketone)
  • PEI (polyetherimide)
  • PPSU (polyphenylsulfone)
  • Acetal
  • Nylon

Liquid 

  • ABS-Like Resin
  • Silicone Rubber
Prototypes

Manufacturing Medical Prototypes

The fabrication of medical prototypes is primarily dependent on material choice. Some materials are very restrictive and only compatible with one type of manufacturing process. 

Here are some of the most commonly used manufacturing processes for medical prototypes.

1.CNC Machining Medical Prototypes

CNC machining is an incredibly versatile and flexible prototype manufacturing method. It has near-universal compatibility with all sorts of metal and plastic materials. CNC allows for quick and precise machining of prototypes. However, different materials come with their own compromises.

Plastic Materials

Plastics like PEEK, PC, Nylon, etc., are generally well regarded for medical prototypes. They are ideal for the prototyping phase, due to their lower cost and lighter weight. Additionally, they are creep and temperature resistant, resulting in easy sterilization.

Metal Materials

Metals are considered premium materials for medical implants but are poor choices for prototyping. Titanium is a highly resilient metal and won’t degrade or react with body tissue. Stainless steel is a low-cost alternative to titanium and is particularly favored for medical equipment and surgical instruments.

Titanium is an expensive raw material that requires expensive tooling and machining to work. This is no issue for final medical implants, but prototypes typically undergo several iterations and changes. So the prototyping costs can add up quickly.

Prototypes

2.Injection Molding Medical Prototypes

Injection molding is a quick and reliable method suitable for large-volume productions. Ideally, you should not use this method for prototyping, as the tooling costs for the molds are incredibly high. Standard prototyping practice dictates you use CNC or 3D printing for your early prototypes and only use injection molding for the final prototype before commercial production.

Plastic Materials

Injection molding is pretty much incompatible with metallic materials, with only a few exceptions. Plastics like PC, PEEK, PEI, and PPSU are commonly used for medical prototypes. Injection-molded plastics are used for mass production parts, while CNC machining is used for patient-specific parts.

Liquid Silicone

Silicone rubber is often used to overcoat rigid plastic medical implants with a softer material. You will commonly see liquid silicone-coated parts in external medical devices, like prosthetics.

An alternative method for liquid silicone coating is vacuum sealing.

3.3D Printing Medical Prototypes

3D Printing is an additive manufacturing technique that can encompass several manufacturing sub-categories. 3D printing is a slower manufacturing process but more versatile than CNC machining.

For medical prototypes, there are only a couple of viable 3D printing processes.

Plastic 3D Printing – FDM

FDM (Fused Deposition Modeling) uses molten plastic extruded through a nozzle to create intricate and complex shapes. Nylon is the only commercially used biocompatible material that is also compatible with FDM.

Metal 3D Printing – SLS

SLS (Selective Laser Sintering) uses a high-powered precisely-controlled laser to selectively sinter (melt) metal powder to create the desired shape. Metal 3D printing is the most expensive manufacturing technique for medical prototyping. 

Titanium is currently the only real choice for this method of medical prototyping.

Resin 3D Printing – SLA

SLA (Stereolithography) uses a  high-powered precisely-controlled laser to cure (harden) photosensitive resin. This is a very rare method of medical prototyping as it is expensive and very limited in material choices. 

Sterilization of Medical Prototypes

Medical equipment is generally non-reactive and safe to use. But over time, germs and microbes will accumulate on the surface. So it is necessary that medical equipment be sterilized before use. Here are some standard sterilization methods for your medical prototypes.

  • Gamma Irradiation (GI)
  • Autoclave (AC)
  • Dry Heat (DH)
  • Ethylene Oxide (EtO)
  • Oxygen Plasma (OP)
  • Ultraviolet (UV)
  • Chemical Sterilization (CS)
Prototypes

Cost of Medical Prototypes

Prototyping medical parts is an expensive endeavor. However, some methods are more expensive than others.

Manufacturing Costs

CNC is the most cost-effective method for prototyping. 3D Printing, on the other hand, is excellent for rapid prototyping but can be more expensive than CNC. Injection molding is not recommended for prototyping and is better suited to mass production.

Material Costs

Metals are obviously the more costly option for prototyping. But CNC machined metal prototypes will be cheaper than 3D printed metal prototypes.

Prototypes

Conclusion

Selecting the right materials for your medical prototypes might seem daunting. However, once you have a good grasp of the process details, it becomes much more manageable. Consider both the manufacturing process and cost impact when selecting the best material option. Some materials are locked into specific manufacturing processes, adding unintended costs to your prototyping phase.

For experienced and skilled prototype manufacturing, look no further than QBH Technology. We offer a diverse range of machining services for the medical industry. Our CNC Machining and Quality Assurance are second to none. As a bonus, we have low MOQ and quick turnaround times.

Don’t miss out on your excellent prototyping services, and Contact us Now!